
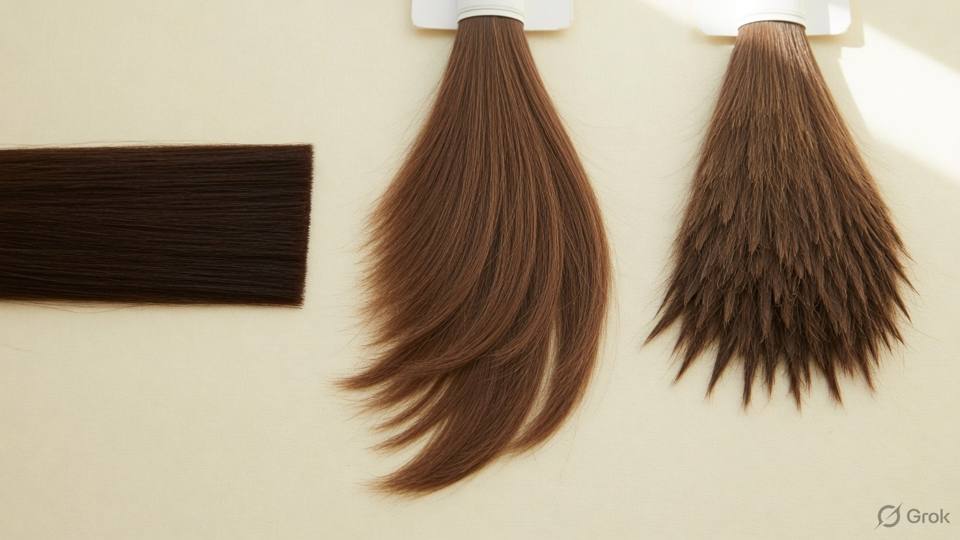
Blunt cutting: the stable line
A blunt cut is one length with zero elevation and a clean perimeter. The hair is combed flat against the skin, held under even tension, and cut with the whole blade on a straight line. The result is a solid edge that makes fine hair look thicker and gives dense hair a strong outline. Blunt does not mean heavy: a blunt line on fine hair can look full, while the same line on coarse hair can look like a helmet if the hair is cut too short. The line is the foundation of most bobs, one-length cuts and men's perimeters. If the line is soft or uneven, every layer above it looks wrong.
The line changes the cut because it controls the silhouette. A blunt perimeter keeps the widest part of the shape at the ends, so it adds weight low on the face. On a narrow jaw, that weight fills the outline. On a wide jaw, it doubles the width. On fine hair, it makes the ends look denser. On curly hair, a blunt line cut wet will spring up unevenly, so the same length has to be cut in the curl shape rather than on a flat line. The decision is not 'blunt or layered'; it is where the blunt line should sit and whether the hair can carry it.
The technique is simple but unforgiving. Comb the hair down with the natural fall, keep the head upright, and hold the section flat between two fingers. Cut with the whole blade, not the tips, and keep the tension the same from the nape to the front. Do not lift the section to 'see better', because lifting changes the length. Check the line with the comb after every few sections, and cross-check the two sides by bringing them together under the chin. If one side is longer, correct the perimeter before you move on. A blunt line that is two millimetres off is visible in a photo and in the mirror.
Use blunt cutting when the hair is straight or gently wavy, when density is low to medium, and when the client wants a strong shape that survives a wash. Avoid a hard blunt line on very curly hair, on hair with weak elasticity, and on a nape that grows out, because the line will kick. On those heads, cut the same length in the natural fall or leave a soft edge. Finish the line with a light point cut only if the client wants softness; otherwise leave it clean. The blunt line is the reference for the rest of the cut, so protect it while you work and check it again after drying.
- Comb the hair into its natural fall with zero elevation and the head upright.
- Hold the section flat between two fingers with even tension.
- Cut with the whole blade on a straight line, not with the tips.
- Keep the tension the same from the nape to the front.
- Check the line with the comb every few sections.
- Cross-check both sides under the chin before you continue.
- Correct the perimeter before cutting any layers above it.
- Dry the hair and recheck the line from the front and the back.
Salon example: Pooja's one-length cut
Pooja has fine, straight hair that reaches the middle of her back, and she wants a one-length cut at the collarbone. She has been losing hair after an illness and the ends look thin. A layered cut would make the ends look thinner, so a blunt line is the right choice. I part the hair down the centre, comb it flat and cut the back section at zero elevation, using the whole blade. I check the line with the comb, then bring both sides forward under her chin and even them. The hair is delicate, so I use light tension and sharp shears. The cut takes fifty minutes because I work in thin sections. When I dry it, the line looks solid and the ends read fuller than they did wet. I point cut only the last five millimetres at the front so the line is not harsh. She books eight weeks ahead and agrees to a dusting in between. She also asks for a photo of the back line, so her sister can check the length between visits. I send it to her the same evening.
Caution: Do not cut a hard blunt line on very curly hair or on a nape that grows outward. Cut the same length in the natural fall, or leave a soft edge, and check it dry before you finish.
Layers and graduation: moving weight
A layer is hair cut at an elevation above zero, so the ends sit at different lengths inside the shape. Graduation is a low elevation, usually forty-five degrees or less, that builds weight just above the perimeter. The two are often confused because both add movement, but they do different jobs. Layers remove weight from the ends and create movement; graduation adds weight at a line and creates volume near the perimeter. A graduated bob feels fuller at the back, while a layered cut feels lighter at the ends. The angle and the section decide which one you get, and the difference is visible from the side, not from the front.
Weight placement is the whole decision. On dense hair, internal layers remove bulk without changing the outline, so the perimeter stays solid and the head feels lighter. On fine hair, short layers remove the little weight there is and make the ends look thin, so keep the layers long and few. On coarse hair, long layers break up the volume, but short layers create a mushroom. On a round face, layers that start at the cheekbone add width where the face is already wide; layers that start below the jaw move the eye down. The shortest layer is the most powerful line in the cut, so place it where you want the eye to go.
The procedure starts with the perimeter, not the layers. Cut the outline first, then decide the elevation for the first layer, then work from the guide. For a graduated shape, cut the perimeter at zero, then take sections at forty-five degrees and build the line gradually. For a layered shape, take the guide at the shortest point and work outward. Keep the sections clean and the tension even. Do not texturise before the shape is complete, because texturising hides mistakes and removes hair you may need. Dry the hair after the main cut and look at the balance before you detail anything.
Check the balance from the front, the side and the back. A layered cut can look even wet and collapse on one side when dry, especially on wavy hair. If one side is heavier, take a small section and re-cut it to the guide rather than thinning the heavy side. If the crown is too flat, the shortest layer may be too long; if the crown is too round, it may be too short. On fine hair, one extra layer can change the whole shape, so add layers one at a time. On dense hair, remove weight inside the shape and leave the perimeter alone. The test is whether the client can reproduce the shape at home with the routine you gave.
- Cut the perimeter before you cut any layer.
- Choose 45 degrees or lower for graduation and above 90 for movement.
- Place the shortest layer where you want the eye to stop.
- Keep layers long and few on fine hair; remove weight inside on dense hair.
- Work from a clean guide and keep the subsection size even.
- Do not texturise until the shape is complete and dry.
- Re-cut a heavy side to the guide instead of thinning it.
- Dry and check the balance from the front, the side and the back.
Salon example: Ayesha's heavy crown
Ayesha has dense, coarse hair that grows straight down from the crown, and she says her head feels heavy by the end of the day. She wants to keep her shoulder length but lose the bulk. A short layer at the crown would make the top stand up and the ends look thin, so I keep the perimeter solid at the shoulder and cut long internal layers starting at the jaw. I cut the perimeter first at zero elevation, then take sections at ninety degrees inside the shape, removing weight from the inner hair rather than the outline. The sections are two centimetres thick and the tension is firm. After the main cut, I dry the hair and look from the side. The crown still has a flat spot, so I re-cut one section at the back to the guide rather than thinning the top. The shape moves without losing the line, and the head feels lighter. I write 'internal layers only, no thinning at the perimeter' on her card. She shakes her head from side to side, and the shape moves without the crown lifting.
Caution: Do not cut short layers at the crown of fine hair or hair with a double whorl. The scalp will show and the shape will collapse within a week; keep the crown layer long enough to lie down.
Point cutting, texturising and the razor rule
Point cutting is cutting small triangles into the ends with the tips of the shears. The blade enters the hair at a slight angle and closes on the ends, not across the section. It softens a hard line, blends two lengths and removes a little weight from the last centimetre. Point cutting is a finish, not a foundation. If you point cut high into the shape, you create holes that grow out as split ends and make the ends look sparse. The correct depth is the last one to two centimetres on straight hair, and less on fine or damaged hair. The cut should look like a soft edge, not like a series of notches.
Slide cutting uses the length of the blade while the hair is held under tension. The shears open slightly and move down the section, cutting as they travel. It softens weight and blends a line on healthy, medium to coarse hair. On fine, dry or compromised hair, slide cutting removes more than you can see and leaves the ends thin. Thinning shears remove a proportion of the hair in one pass, and the eye cannot judge how much until the hair is dry. The rule for all three tools is the same: one pass, then dry and look. You can always take more; you cannot put it back.
The razor is the least forgiving tool. A razor cuts the hair at an angle and opens the cuticle, which gives a soft, textured edge on coarse, healthy hair. On frizz-prone, fine, porous or curly hair, it raises the surface and turns the ends into a fuzzy halo, especially in humidity. A razor should never be used on hair that is already dry, damaged or gummy, and never close to the scalp. If the client wants a soft edge, point cutting with sharp shears gives most of the effect without the frizz. If you do use a razor, use it on damp hair, with light pressure, and only on the ends.
Texturising is the last step, and it should be the smallest. Dry the shape, look at it from three angles, and decide which area is too heavy. Take one section at a time, point cut or slide cut a small amount, and dry it again. Do not texturise the perimeter of a bob, the crown of fine hair, or the hairline of a client with a cowlick. Do not thin thick, frizz-prone hair with a razor or an aggressive thinner; remove weight with a longer internal layer instead. Keep the perimeter line solid and take the bulk from inside. The client should leave with a shape that still looks intentional after a wash, not with a shape that only works in the salon.
- Point cut only the last 1 to 2 cm of the ends, at a slight angle.
- Use the tips of the shears and close them on the ends, not across the section.
- Do not point cut high into the shape; holes grow out as split ends.
- Slide cut only healthy, medium to coarse hair, with light tension.
- Make one pass with thinning shears, then dry and look before a second.
- Keep the razor off frizz-prone, fine, porous, curly or damaged hair.
- Remove bulk with a longer internal layer, not a hole in the perimeter.
- Finish the detail, dry again, and check from the front, the side and the back.
Salon example: Tanvi's fuzzy ends
Tanvi has thick, wavy hair that she straightens twice a week, and she wants a soft, textured collarbone cut. Her ends are porous and the surface frizzes in humidity. A razor would give the soft edge she likes for a day and a fuzzy halo for a month, so I do not use one. I cut the perimeter blunt at zero elevation, then point cut the last centimetre at the front and sides, working with the wave rather than against it. I use thinning shears on one internal section at the back, one pass, then dry the hair. The ends look softer but still full. I check from the side and decide the left side is slightly heavier, so I point cut two small sections rather than thinning the whole side. The finished shape has movement and no halo. I show her the difference between a cut end and a frayed end, and write 'no razor, point cut only' on her card. She buys the light serum I used on the ends, and I tell her to keep it away from the roots.
Caution: Do not use a razor or aggressive thinning shears on frizz-prone, fine, porous or curly hair. The frizz appears within days and cannot be cut out without losing length.
This is a Nandu Nai textbook. It is a private brand book, not a government licence, and it does not give the right to give medical treatment.