
Centre part, straight medium
A centre part with straight medium hair is the calmest shape in the men's chair: the hair falls to the chin on both sides of a clean middle line, and the outline stays even from front to back. It suits adult men with straight or very slightly wavy hair and medium density, because the weight sits at the perimeter and keeps the shape solid. At consultation, comb the hair dry and find where it already parts; a forced centre line against a strong cowlick will fight him every morning. Agree the chin mark in centimetres, show the length with the comb, and say that the photo is a reference for the idea, not a promise of the same fall.
Cut the perimeter at zero elevation, with the hair combed straight down and the shears parallel to the floor, so the two sides keep one length. Section from the agreed centre part to each ear and from the crown to the nape, then take horizontal partings no wider than the comb. Carry the guide from the back to the front on each side, checking that the line at the chin is level. Dry the hair, re-part it, and trim any small step. If heat is used, keep it at or below 200 C. The cut takes 45 to 75 minutes, and he rebooks in 6 to 8 weeks.
- 1. Consult with dry hair, find the natural centre part, and agree the chin length in centimetres before the cape goes on.
- 2. Section from the part to each ear and crown to nape, then take horizontal partings no wider than the comb.
- 3. Cut the back guide at zero elevation and carry it forward on both sides with even tension.
- 4. Keep the shears parallel to the floor at the perimeter, with no layers and no point cutting in the outline.
- 5. Cross-check both sides by combing them forward and comparing the chin line at eye level.
- 6. Dry the hair, re-part it, and trim only the small step that the dry line exposes.
- 7. If heat is used, keep the tool at or below 200 C and keep it moving.
- 8. Rebook in 6 to 8 weeks, and tell him the shape grows out evenly but the ends thin first.
Salon example: Arjun's centre part
Arjun, twenty-nine, an office manager, came in with straight, medium-density hair that touched his jaw and asked for a centre part like a photo on his phone. I combed the hair dry and found his natural part about a centimetre left of centre, with a small cowlick at the front. I refused a hard centre line and agreed to follow his natural part, then move it only half a centimetre toward the middle. We set the chin mark at 11 cm from the crown and checked it with the comb on both sides. I cut the perimeter at zero elevation, carried the guide from the nape to the front, and cross-checked the two sides at eye level. Dried and re-parted, the line sat level. He rebooked in seven weeks and said the shape was easy to comb after washing. I wrote the part position and the 11 cm mark on his card.
Caution: Do not force a centre part against a strong cowlick, because the hair will split and stand up within a day; move the part to the nearest natural line and agree it first.
Deep side part
A deep side part places the parting low on one side, usually above the temple, and leaves 7 to 10 cm of length on top so the hair can be combed across and back. It suits adult men with straight or slightly wavy hair and a medium to thick top, because the weight of the top keeps the line in place without products. At consultation, wet the hairline and find the natural whorl and growth direction, then agree which side the part sits on and how far back it should run. A low part on a strong crown whorl will lift, so check the dry fall before you commit. Show the top length with the comb.
Cut the top first, using the agreed part as the guide, and keep the front 7 to 10 cm long so it can cross the head. Comb the top across the part, cut with slight over-direction, and check the two sides are level when combed forward. Taper the sides and back with scissors or a clipper guard no shorter than a 2, which is about 6 mm, and blend the corner without digging a line. Refine the ends with point cutting only if the client wants a softer surface. Keep heat at or below 200 C. The cut takes 30 to 40 minutes and he rebooks in 3 to 4 weeks.
- 1. Consult with dry hair, find the natural whorl, and agree which side the part sits on and how far back it runs.
- 2. Mark the top length at 7 to 10 cm with the comb, then section the top along the agreed part.
- 3. Cut the top across the part with slight over-direction, keeping the front long enough to cross the head.
- 4. Taper the sides and back with scissors or a clipper guard no shorter than a 2, about 6 mm.
- 5. Blend the corner between the top and the sides without digging a visible line.
- 6. Cross-check by combing the top forward on both sides and comparing the level at the brow.
- 7. Dry check the part and the top fall, and keep any heat at or below 200 C.
- 8. Rebook in 3 to 4 weeks, and tell him the part is the first line to lose its edge.
Salon example: Rohan's low part
Rohan, thirty-four, a sales manager, came in with straight, medium-density hair and a photo of a deep side part. His hair already parted above the left temple, about 4 cm back from the hairline, and the top measured 8 cm when combed across. I checked the crown whorl and found it sitting toward the back, so the low part would hold without lifting. We agreed the part on the left, running back to the crown, and kept the top at 8 cm. I cut the top across the part with slight over-direction, then tapered the sides with a 2 guard, about 6 mm, and blended the corner above the ear. Both sides were checked at the brow, and the dry finish sat flat. He rebooked in four weeks and said the part was easy to find after washing. I wrote the part position on his card.
Caution: Do not shave a hard line into the part, because the skin line grows back as a pale stripe and the part looks wider every week.
Long slick back
A long slick back keeps the hair at collar length and dries it straight back off the face, so the front is open and the shape looks formal without a hard line. It suits adult men with straight or gently wavy hair and medium to thick density, because the weight holds the back direction. At consultation, ask what he puts in his hair and how often; if it is oiled, plan two shampoos before the cut. Agree the collar mark in centimetres, check the front hairline for thinning, and look at how the hair falls at the crown. The photo is a reference, so say that a heavier oil or a strong whorl will change the finish.
Wash twice if the hair was oiled, then towel dry and cut damp, not soaking. Section from the crown to the nape and from ear to ear, and cut the perimeter at zero elevation so the length stays solid at the collar. Comb each section straight back and use the previous section as the guide; keep the sides close above the ear without taking them short. Do not gouge the crown, because a short patch there will stand up when the hair is slicked back. Dry with a brush and keep heat at or below 200 C. The cut takes 45 to 75 minutes and he rebooks in 6 to 8 weeks.
- 1. Ask what he puts in his hair, and plan two shampoos if it was oiled before the cut.
- 2. Towel dry the hair and cut damp, not soaking, so the comb can control the direction.
- 3. Section from crown to nape and ear to ear, then cut the collar line at zero elevation.
- 4. Comb each section straight back, using the previous section as the guide, and keep the sides close above the ear.
- 5. Do not gouge the crown, because a short patch will stand up when the hair is slicked back.
- 6. Dry with a brush and keep any heat at or below 200 C.
- 7. Cross-check the collar line and the front hairline with the head upright and then tilted down.
- 8. Rebook in 6 to 8 weeks, and tell him the back grows out before the front.
Salon example: Vikram's collar-length slick back
Vikram, forty-one, a lawyer, came in with straight, thick hair at collar length and said he needed the back to sit flat for early court mornings. His hair had oil in it, so I shampooed twice, towel dried it, and cut it damp. We agreed 24 cm from the crown at the collar and checked the mark with the comb. I cut the perimeter at zero elevation, combed every section straight back, and kept the sides just close above the ear rather than short. I did not gouge the crown, so the back stayed flat when he slicked it. Dried with a brush and heat below 200 C, the line sat clean. He rebooked in seven weeks and said the two shampoos made the hair feel lighter. I wrote 24 cm and the two-shampoo note on his card.
Caution: Do not skip the second shampoo on heavily oiled hair, because the comb and shears slip and the line cuts unevenly.
Textured lob
A textured lob for men sits between the jaw and the collar, with a solid outline and soft internal movement, so the shape looks relaxed but still has a clean edge. It suits adult men with medium to thick straight, wavy or loosely curly hair who want length without a heavy, solid mass. At consultation, agree the hem at the jaw or the collar in centimetres and say that the outline will stay solid while only the inside is textured. Check density at the crown, the sides and the nape, because internal texture removes weight and fine hair can lose its cover. Show the front, side and back in the mirror.
Cut the perimeter first at zero elevation, all the way around, and keep that line as the anchor. Then take vertical sections inside the shape and point cut from mid-length to the ends, staying below the jaw so the outline cannot collapse. Do not slide cut or razor the interior on fine hair, because the ends will look sparse. On wavy hair, cut the interior dry where possible so the bounce is visible, and keep the outside line damp for a clean finish. Dry check the outline and the movement, then rebook in 6 to 8 weeks. The cut takes 45 to 75 minutes.
- 1. Consult with dry hair, agree the hem at the jaw or the collar in centimetres, and show it with the comb.
- 2. Cut the perimeter at zero elevation all the way around, and keep that line as the anchor.
- 3. Take vertical sections inside the shape and point cut from mid-length to the ends, staying below the jaw.
- 4. Do not slide cut or razor the interior on fine hair, because the ends will look sparse.
- 5. On wavy hair, cut the interior dry where possible so the bounce is visible, and keep the outside line damp.
- 6. Cross-check the outline from the front, both sides and the back before drying.
- 7. Dry the hair and check that the outline is solid and the interior moves as one soft piece.
- 8. Rebook in 6 to 8 weeks, and tell him the texture shows more as the hair grows.
Salon example: Kabir's textured lob
Kabir, twenty-seven, a graphic designer, came in with wavy hair just below the jaw and asked for length without a heavy block. His density was medium to thick and his front hairline was solid. We set the hem 2 cm below the collar, at 21 cm from the crown. I cut the perimeter at zero elevation, kept that line as the anchor, then took vertical sections inside and point cut below the jaw only. His hair was not fine, so a little internal texture was safe. Dried, the outline stayed solid and the hair moved as one soft piece. He rebooked in seven weeks and said the shape held without product. I wrote 21 cm and the below-jaw texture note on his card.
Caution: Do not point cut above the jaw on fine hair, because the internal texture will remove the weight that keeps the outline solid.
Jaw-length blunt cut
A jaw-length blunt cut for men is one clean line at the jaw, with no fringe unless he asks for one. It suits adult men with straight or slightly wavy hair and medium density, and it gives a strong, even shape that reads well from the front and the back. At consultation, find the jaw hinge and mark the length in centimetres, then show it with the comb on both sides. Check the front hairline and the crown, because a blunt line exposes thin ends. Ask about a fringe directly, and say that the default plan leaves the front open and even. The photo is a reference for the line.
Cut the perimeter at zero elevation, with the hair combed straight down and the shears parallel to the floor. Section from the centre part to each ear and from the crown to the nape, take horizontal partings, and carry the guide around the head with even tension. Do not add a fringe as part of the same line; if he wants one, it is a separate section with its own guide. Refine the dry line after blow-drying, with heat at or below 200 C. The cut takes 45 to 75 minutes and he rebooks in 6 to 8 weeks.
- 1. Consult with dry hair, find the jaw hinge, and mark the length in centimetres on both sides.
- 2. Ask about a fringe directly, and record that the default plan leaves the front open and even.
- 3. Section from the centre part to each ear and from the crown to the nape, then take horizontal partings.
- 4. Cut the perimeter at zero elevation with the shears parallel to the floor, and carry the guide around the head.
- 5. Do not add a fringe as part of the same line; if he wants one, cut it as a separate section with its own guide.
- 6. Cross-check both sides by combing them forward and comparing the jaw line at eye level.
- 7. Dry the hair and refine the line with small trims only, then check the back in the mirror.
- 8. Rebook in 6 to 8 weeks, and tell him the line stays clean but the ends need a trim to look full.
Salon example: Aditya's jaw line
Aditya, thirty-one, a school teacher, came in with straight, medium-density hair below the jaw and asked for a clean jaw-length line. I found the jaw hinge and showed 12 cm from the crown with the comb on both sides. He did not ask for a fringe, so I said the default plan would leave the front open and even, and he agreed. I cut the perimeter at zero elevation, carried the guide from the nape to the front, and checked both sides at eye level. Dried, the line sat straight and no fringe was added. He rebooked in seven weeks and said the shape was easy to comb in the morning. I wrote 12 cm and no fringe on his card.
Caution: Do not add a fringe without asking, because it changes the front of the shape and is not part of the blunt line.
Curly bob
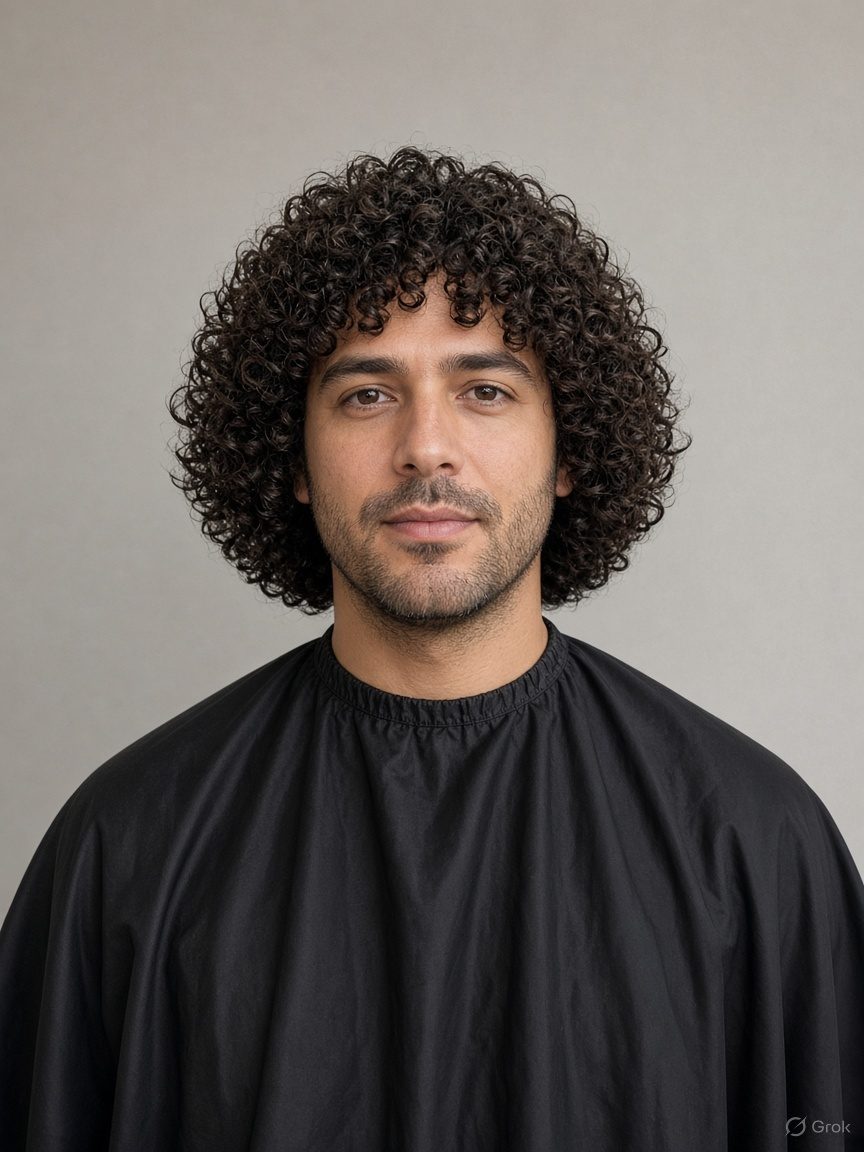
A curly bob for men is cut dry to the jaw, so the length is measured where the curls actually sit, not where they hang when wet. It suits adult men with medium to thick curls who want a rounded shape with a clear jaw line and no heavy weight at the ends. At consultation, look at the dry curl pattern, shrinkage and density, and agree the jaw mark with the hair in its natural fall. Do not stretch a curl to show length, because it will spring back above the agreed line. Show the difference between wet and dry length, and say that the outline will be soft, not razor sharp.
Cut dry, curl by curl, using the jaw mark as the outline and keeping the interior rounded rather than layered short. Work in small sections, cut with the curl direction, and check the shape from the front, both sides and the back as you go. Do not use tension, because a stretched curl cuts too short. Keep the perimeter soft and remove only the weight that stops the curls sitting together. No heat is needed; if a diffuser is used, keep it at or below 200 C. The cut takes 45 to 75 minutes and he rebooks in 6 to 8 weeks.
- 1. Consult on dry hair, check the curl pattern, shrinkage and density, and agree the jaw mark in its natural fall.
- 2. Do not stretch a curl to show length, because it will spring back above the agreed line.
- 3. Cut dry, curl by curl, using the jaw mark as the outline and keeping the interior rounded.
- 4. Work in small sections, cut with the curl direction, and check the shape from the front, sides and back.
- 5. Do not use tension, because a stretched curl cuts too short and cannot be repaired.
- 6. Remove only the weight that stops the curls sitting together, and leave the perimeter soft.
- 7. Use no heat; if a diffuser is used, keep it at or below 200 C.
- 8. Rebook in 6 to 8 weeks, and tell him the shape is cut to sit at the jaw when dry.
Salon example: Imran's dry curly bob
Imran, twenty-six, a cafe owner, came in with thick curls that reached the collar when wet and shrank to below the ear when dry. He wanted a rounded shape at the jaw without heavy ends. I checked the dry pattern, shrinkage and density, agreed the jaw mark in its natural fall, and did not stretch a curl. I cut the perimeter dry, curl by curl, and kept the inside rounded. No tension was used, so the length stayed on the agreed line. Dried, the shape sat at the jaw and the curls grouped together. He rebooked in seven weeks and said he did not need a diffuser. I wrote the jaw mark and the dry-cut note on his card.
Caution: Never cut a curly bob wet, because wet curls sit longer and the dry shape will jump above the jaw.
High and tight fade
A high and tight fade takes the sides down to skin high on the head and leaves a short top of about 1.5 cm, so the shape is sharp, clean and easy to keep. It suits adult men with a straight or slightly wavy top and a hairline that can carry a high line; check for scars, moles and a crown whorl before you promise the height. At consultation, agree where the fade line sits above the temple and how the top will be worn. Say that the skin line will be visible within days, and that the style needs frequent visits to stay sharp. Show the top length with a comb.
Set the fade line with the client looking straight ahead, then work the sides from the bottom up. Use a 0.5 guard, about 1.5 mm, at the skin line, a 1 guard, about 3 mm, just above it, a 2 guard, about 6 mm, through the middle, and a 3 guard, about 10 mm, at the top of the blend. Keep the line on both sides level with the brow, and flick the clipper out at the blend so you do not dig a step. Cut the top to about 1.5 cm with scissors or a longer guard, then check the outline. The cut takes 20 to 40 minutes and he rebooks in 2 to 3 weeks.
- 1. Consult with dry hair, check scars, moles and the crown whorl, and agree the fade height at the temple.
- 2. Set the fade line with the client looking straight ahead, then keep the line level on both sides.
- 3. Use a 0.5 guard, about 1.5 mm, at the skin line, and a 1 guard, about 3 mm, just above it.
- 4. Use a 2 guard, about 6 mm, through the middle, and a 3 guard, about 10 mm, at the top of the blend.
- 5. Flick the clipper out at the blend so you do not dig a step, and check the corner above the ear.
- 6. Cut the top to about 1.5 cm with scissors or a longer guard, following the growth pattern.
- 7. Dry check the outline from the front, both sides and the back, with the head level.
- 8. Rebook in 2 to 3 weeks, and tell him the skin line shows first.
Salon example: Sameer's high tight fade
Sameer, thirty, a gym trainer, came in with straight hair and asked for a high and tight fade. He had a small scar at the nape, so I set the skin line below it. With him looking straight ahead, I set the line above the temple and kept both sides level with the brow. I used a 0.5 guard, about 1.5 mm, at the skin, a 1 guard, about 3 mm, above it, a 2 guard, about 6 mm, through the middle, and a 3 guard, about 10 mm, at the blend. I flicked the clipper out at the blend, so no step formed. The top was cut to about 1.5 cm. He rebooked in three weeks and said he liked the sharp shape. I wrote the fade height and the scar position on his card.
Caution: Do not take the skin line above the curve of the head, because the top will look like a separate island and the fade will lose its shape.
Low and tight fade
A low and tight fade keeps the fade close to the neckline and the ear, with the top clipped to about 2 cm, so the shape is tidy without the sharpness of a high skin fade. It suits adult men with straight, wavy or lightly curly hair and a top that can sit short without patches. At consultation, agree the height of the fade at the ear and the nape, and check the crown and hairline for thin spots. Say that the top will be short enough to need a visit every few weeks. Show the client how the low line will look from the side, because that is where the shape is judged.
Start at the nape with a 1 guard, about 3 mm, and move up through a 2 guard, about 6 mm, then a 3 guard, about 10 mm, keeping the fade low and tight. Blend the corner above the ear with the clipper cornering method, and check both sides at eye level before you touch the top. Cut the top to about 2 cm with clippers or scissors, following the growth pattern, and keep the front slightly longer if the hairline is uneven. Flick the clipper out at the top of the fade to avoid a line. The cut takes 20 to 40 minutes and he rebooks in 3 to 4 weeks.
- 1. Consult with dry hair, agree the fade height at the ear and the nape, and check for thin patches.
- 2. Start at the nape with a 1 guard, about 3 mm, and keep the fade low.
- 3. Move up through a 2 guard, about 6 mm, then a 3 guard, about 10 mm, blending the corner above the ear.
- 4. Check both sides at eye level before you touch the top, because the low line is judged from the side.
- 5. Cut the top to about 2 cm following the growth pattern, and keep the front slightly longer if the hairline is uneven.
- 6. Flick the clipper out at the top of the fade to avoid a line.
- 7. Dry check the sides, the neckline and the top with the client standing and seated.
- 8. Rebook in 3 to 4 weeks, and tell him the top loses its shape first.
Salon example: Nikhil's low tight fade
Nikhil, thirty-five, an accountant, came in with lightly wavy hair and asked for a clean cut that was not a skin fade. His top was medium density and his hairline was even. We set the fade low at the ear and the nape. I started at the nape with a 1 guard, about 3 mm, then moved up through a 2 guard, about 6 mm, and a 3 guard, about 10 mm. I blended the corner above the ear with cornering and checked both sides at eye level before touching the top. The top was cut to about 2 cm, and I left the front slightly longer because his hairline dips at one corner. Dried, the sides were clean and the top sat even. He rebooked in four weeks. I wrote the fade height and 2 cm top on his card.
Caution: Do not push a low fade up to the temple, because it becomes a high fade and the top looks smaller than agreed.
Mid and tight fade
A mid and tight fade puts the fade line between the temple and the top of the ear, with the top clipped to about 2 cm, so it balances a clean side with a little more top than a low fade. It suits adult men with straight or wavy hair and a medium-density top, and it works well when the hairline is uneven because the mid line draws the eye away from the corners. At consultation, agree the height at the temple and the nape, and check the crown for a whorl that will show when the top is short. Show the side profile in the mirror.
Work the sides from the bottom up with a 0.5 guard, about 1.5 mm, at the base, a 1 guard, about 3 mm, above it, a 2 guard, about 6 mm, through the blend, and a 3 guard, about 10 mm, at the top of the fade. Keep the line level on both sides and flick the clipper out at the blend. Cut the top to about 2 cm following the growth pattern, and check the front hairline before you shorten the corners. Keep the neckline clean and the ears clear. The cut takes 20 to 40 minutes and he rebooks in 3 to 4 weeks.
- 1. Consult with dry hair, agree the fade height at the temple and the nape, and check the crown whorl.
- 2. Work the sides from the bottom up with a 0.5 guard, about 1.5 mm, and a 1 guard, about 3 mm, above it.
- 3. Use a 2 guard, about 6 mm, through the blend and a 3 guard, about 10 mm, at the top of the fade.
- 4. Keep the line level on both sides and flick the clipper out at the blend.
- 5. Cut the top to about 2 cm following the growth pattern, and check the front hairline before shortening the corners.
- 6. Keep the neckline clean and the ears clear, and check the corner above each ear.
- 7. Dry check the side profile in the mirror, because a mid fade is judged from the side.
- 8. Rebook in 3 to 4 weeks, and tell him the mid line shows before the top does.
Salon example: Farhan's mid tight fade
Farhan, twenty-eight, a technician, came in with straight hair and an uneven hairline, and asked for a mid fade. His crown had a small whorl, so I kept the top at 2 cm rather than shorter. I set the line at the temple and the nape and kept both sides at the same height. I used a 0.5 guard, about 1.5 mm, at the base, a 1 guard, about 3 mm, above it, a 2 guard, about 6 mm, through the blend, and a 3 guard, about 10 mm, at the top of the fade. I flicked the clipper out and blended the corner. The top was cut to about 2 cm, and I left the front corners alone after checking the hairline. Dried, the side profile was even. He rebooked in four weeks. I wrote the mid line height and 2 cm top on his card.
Caution: Do not set the two sides at different heights, because a mid fade that is even a few millimetres off shows from the front.
Messy fringe with a fade

A messy fringe with a fade pairs a low fade with a piece-y fringe of 5 to 7 cm, so the front stays soft while the sides look sharp. It suits adult men with straight or slightly wavy hair and enough density at the front to carry a fringe. At consultation, agree the fringe length in centimetres and show how it will sit with the hair dry and pushed forward. Check the forehead and hairline, and ask whether he wants the fringe to fall straight or to one side. Say that the messy look is cut in, not styled in, and that a heavy product will make it look flat.
Cut the fringe first, on dry hair, so you can see the natural fall, and keep it 5 to 7 cm long with point cutting through the ends. Then set the low fade with a 1 guard, about 3 mm, at the base, a 2 guard, about 6 mm, in the middle, and a 3 guard, about 10 mm, at the top of the blend, keeping the line low at the ear and nape. Blend the corners and flick the clipper out. Do not over-thin the fringe, because it will separate into gaps. Keep heat at or below 200 C. The cut takes 20 to 40 minutes and he rebooks in 3 to 4 weeks.
- 1. Consult with dry hair, agree the fringe length at 5 to 7 cm, and show how it falls forward.
- 2. Cut the fringe first on dry hair, with point cutting through the ends, and keep the length piece-y.
- 3. Set the low fade with a 1 guard, about 3 mm, at the base and a 2 guard, about 6 mm, in the middle.
- 4. Use a 3 guard, about 10 mm, at the top of the blend, and keep the line low at the ear and nape.
- 5. Blend the corners and flick the clipper out, without digging a line above the ear.
- 6. Do not over-thin the fringe, because the ends will separate into gaps.
- 7. Dry check the fringe with the head upright and tilted down, and keep heat at or below 200 C.
- 8. Rebook in 3 to 4 weeks, and tell him the fringe is the first part to look heavy.
Salon example: Dev's messy fringe
Dev, twenty-four, a student, came in with straight, thick hair and asked for a messy fringe with a low fade. His hairline was solid and the front had enough density for a fringe. We agreed a 6 cm fringe and cut it first on dry hair with point cutting through the ends. Then I set the low fade with a 1 guard, about 3 mm, at the base, a 2 guard, about 6 mm, in the middle, and a 3 guard, about 10 mm, at the top of the blend. I kept the line low at the ear and nape and blended the corners. I did not over-thin the fringe, so the ends stayed full. Dried, the fringe fell softly forward and the sides looked sharp. He rebooked in three weeks. I wrote 6 cm and the guard sequence on his card.
Caution: Do not over-thin the fringe, because the ends will split into gaps and the messy look will read as sparse.
Crop with a skin fade
A crop with a skin fade keeps a short French crop on top and takes the skin only at the bottom of the fade, so the sides look sharp without turning the whole head into a skin cut. It suits adult men with straight or slightly wavy hair and a strong enough hairline to carry a short fringe. At consultation, agree the top length and the height of the skin line, and check for moles or scars at the nape. Say clearly that the skin will be visible only at the bottom and that the upper blend will stay soft. Show the top and the fringe with the comb.
Cut the top first to the agreed crop length, keeping the fringe slightly longer than the crown, then set the skin line at the bottom with a 0.5 guard, about 1.5 mm. Move up through a 1 guard, about 3 mm, a 2 guard, about 6 mm, and a 3 guard, about 10 mm, so the skin stays at the base and the blend stays soft. Keep the line level at both sides and flick the clipper out at the top. Check the fringe dry and point cut only the corners. The cut takes 20 to 40 minutes and he rebooks in 2 to 3 weeks.
- 1. Consult with dry hair, agree the top length and the height of the skin line, and check the nape for marks.
- 2. Cut the top first, keeping the fringe slightly longer than the crown.
- 3. Set the skin line at the bottom with a 0.5 guard, about 1.5 mm, and keep the skin only at the base.
- 4. Move up through a 1 guard, about 3 mm, a 2 guard, about 6 mm, and a 3 guard, about 10 mm.
- 5. Keep the line level on both sides and flick the clipper out at the top of the fade.
- 6. Check the fringe dry and point cut only the corners, without thinning the middle.
- 7. Dry check the crop top, the skin line and the neckline from the front, sides and back.
- 8. Rebook in 2 to 3 weeks, and tell him the skin line needs the closest visit.
Salon example: Manav's crop and skin fade
Manav, twenty-two, a student, came in with straight hair and asked for a crop with a skin fade. He had a small mole at the nape, so I set the skin line away from it. We agreed a 3 cm top and a 2 cm fringe. I cut the top first, then set the skin line at the bottom with a 0.5 guard, about 1.5 mm, and moved up through a 1 guard, about 3 mm, a 2 guard, about 6 mm, and a 3 guard, about 10 mm. The skin stayed at the base and the upper blend stayed soft. I checked the fringe dry and point cut only the corners. Dried, the crop top sat even and the sides looked clean. He rebooked in three weeks and said the sharp edge suited him. I wrote 3 cm, 2 cm and the skin line position on his card.
Caution: Do not carry the skin guard above the bottom of the fade, because the sides will look bald and the soft blend will be lost.
Tapered crew
A tapered crew keeps the top at 2 to 4 cm and tapers the sides and back with scissors, not a skin fade, so the shape is neat and conservative without a shaved line. It suits adult men with straight or slightly wavy hair, a medium-density top and a hairline that does not need a sharp corner. At consultation, agree the top length and the height of the taper at the ear and nape, and show the difference between a scissor taper and a clipper fade. Ask how often he wants to return, because a crew keeps its shape only with regular visits.
Cut the top to 2 to 4 cm following the growth pattern, with the front slightly longer than the crown. Then taper the sides and back with scissor-over-comb, starting at the nape and working up, keeping the blades parallel to the head and the comb moving. Do not run a clipper guard into the hairline, because that turns the taper into a fade. Blend the corner above the ear with the points of the shears, and cross-check both sides at eye level. Dry check the top and the neckline. The cut takes 20 to 40 minutes and he rebooks in 3 to 4 weeks.
- 1. Consult with dry hair, agree the top length at 2 to 4 cm and the taper height at the ear and nape.
- 2. Show the difference between a scissor taper and a clipper fade before you start.
- 3. Cut the top to 2 to 4 cm following the growth pattern, with the front slightly longer than the crown.
- 4. Taper the sides and back with scissor-over-comb, from the nape upward, with the blades parallel to the head.
- 5. Do not run a clipper guard into the hairline, because that turns the taper into a fade.
- 6. Blend the corner above the ear with the points of the shears and cross-check both sides.
- 7. Dry check the top, the neckline and the hairline, and keep heat at or below 200 C.
- 8. Rebook in 3 to 4 weeks, and tell him the crew holds its shape only with regular visits.
Salon example: Rahul's tapered crew
Rahul, thirty-eight, a bank manager, came in with straight hair and asked for a clean cut that was not a skin fade. His top was medium density and his hairline was soft. I showed him the difference between a scissor taper and a clipper fade in the mirror, and he chose the scissor taper. I cut the top to 3 cm and left the front slightly longer. Then I tapered the sides and back with scissor-over-comb from the nape upward, keeping the blades parallel and the comb moving. I did not run a clipper guard into the hairline. I blended the corner above the ear with the points of the shears and checked both sides. Dried, the top and neckline sat clean. He rebooked in four weeks. I wrote 3 cm and the scissor taper note on his card.
Caution: Do not use a 0.5 guard, about 1.5 mm, and call it a taper, because the brief is a scissor taper and the hairline must stay soft.
Scissor fade
A scissor fade cuts the fade with shears and comb only, with no clipper, so the transition from short to long is soft and the hairline stays natural. It suits adult men who want a clean side but dislike the hard edge of a clipper fade, and it works on straight, wavy or lightly curly hair with a medium-density top. At consultation, agree how high the fade should sit and how short the bottom will be, and say that the finish will be softer than a clipper line. Check the neckline and the crown, and show the client the difference in the mirror before you start.
Start at the nape with the comb flat and the shears parallel to the head, and cut the bottom section short with the points of the shears. Move up in narrow horizontal bands, lifting the comb slightly with each band, and keep the blades parallel so you do not dig a step. Work both sides from the bottom up and cross-check at eye level. Keep the top at the agreed length and blend the corner above the ear. Do not use a clipper to fix the line, because that defeats the technique. The cut takes 30 to 40 minutes and he rebooks in 3 to 4 weeks.
- 1. Consult with dry hair, agree the fade height and how short the bottom will be, and show the softer finish.
- 2. Start at the nape with the comb flat and the shears parallel to the head.
- 3. Cut the bottom section short with the points of the shears, then move up in narrow horizontal bands.
- 4. Lift the comb slightly with each band and keep the blades parallel so you do not dig a step.
- 5. Work both sides from the bottom up, then cross-check at eye level.
- 6. Keep the top at the agreed length and blend the corner above the ear.
- 7. Do not use a clipper to fix the line, because that defeats the scissor technique.
- 8. Rebook in 3 to 4 weeks, and tell him the soft fade grows out without a hard band.
Salon example: Yusuf's scissor fade
Yusuf, thirty-three, a photographer, came in with lightly curly hair and asked for a clean side without the hard edge of a clipper fade. His top was medium density. We agreed the fade height at the middle of the ear and a short bottom. I started at the nape with the comb flat and the shears parallel to the head, cut the bottom with the points, and moved up in narrow bands. I lifted the comb slightly with each band and kept the blades parallel, so no step was dug. I worked both sides from the bottom up and checked them at eye level, then kept the top at the agreed length. Dried, the transition looked soft. He rebooked in four weeks. I wrote the fade height and the no-clipper note on his card.
Caution: Do not dig the points of the shears into the fade line, because a scissor fade shows every notch and cannot be hidden with a guard.
Clipper-over-comb fade
A clipper-over-comb fade uses a clipper and a comb together, with the clipper flicked out at the end of each pass, so the blade cuts the hair that stands above the comb without digging a line. It suits adult men with straight, wavy or lightly curly hair and a top that can sit short, and it gives a softer result than a freehand skin fade. At consultation, agree the height of the fade and the top length, and check the growth pattern at the nape. Say that the comb determines the length, so the same guard can give a different result on a different head.
Set the bottom with a 0.5 guard, about 1.5 mm, then work up with a 1 guard, about 3 mm, a 2 guard, about 6 mm, and a 3 guard, about 10 mm, always over the comb. Keep the comb flat against the head, move it upward with the clipper, and flick the clipper out at the top of each pass instead of stopping flat. Blend the corner above the ear and check both sides in the mirror. Cut the top to the agreed length and clean the neckline. The cut takes 20 to 40 minutes and he rebooks in 3 to 4 weeks.
- 1. Consult with dry hair, agree the fade height and top length, and check the growth pattern at the nape.
- 2. Set the bottom with a 0.5 guard, about 1.5 mm, then move up with a 1 guard, about 3 mm.
- 3. Continue with a 2 guard, about 6 mm, and a 3 guard, about 10 mm, always over the comb.
- 4. Keep the comb flat against the head, move it upward with the clipper, and flick the clipper out at the top of each pass.
- 5. Blend the corner above the ear and check both sides in the mirror.
- 6. Cut the top to the agreed length and clean the neckline.
- 7. Dry check the fade for steps, then look at the head from the side and the back.
- 8. Rebook in 3 to 4 weeks, and tell him the comb work keeps the fade soft.
Salon example: Aamir's clipper-over-comb fade
Aamir, thirty-six, a shopkeeper, came in with straight hair and asked for a fade that did not look as sharp as skin. His top was medium density and his nape hair grew downward. We agreed the fade height below the ear and a 2.5 cm top. I set the bottom with a 0.5 guard, about 1.5 mm, then moved up with a 1 guard, about 3 mm, a 2 guard, about 6 mm, and a 3 guard, about 10 mm, always over the comb. I kept the comb flat, moved it upward with the clipper, and flicked the clipper out at the top of each pass. I blended the corner above the ear and checked both sides. Dried, the fade looked soft and even. He rebooked in four weeks. I wrote the guard order and 2.5 cm top on his card.
Caution: Do not stop the clipper flat at the top of a pass, because it will dig a line that the comb was meant to prevent.
Short afro with a fade

A short afro with a fade keeps the afro top cut dry to its natural shape and fades the sides, so the volume sits above a clean, tight outline. It suits adult men with coily or tightly curled hair who want a rounded top without heavy sides. At consultation, look at the dry coil pattern, shrinkage and density, and agree how much height to leave on top. Do not measure the top by stretching a coil, because it will spring back and the shape will be smaller than agreed. Check the hairline and the nape, and show the client the side profile before the first cut.
Cut the top dry, coil by coil, with the hair in its natural fall, and keep the shape rounded rather than flat. Then fade the sides with a 0.5 guard, about 1.5 mm, at the bottom, a 1 guard, about 3 mm, above it, a 2 guard, about 6 mm, through the blend, and a 3 guard, about 10 mm, at the top of the fade. Keep the line level on both sides and flick the clipper out. Do not pull the top with a comb while cutting, because the dry shape will change when it is released. No heat is needed. The cut takes 20 to 40 minutes and he rebooks in 3 to 4 weeks.
- 1. Consult on dry hair, check the coil pattern, shrinkage and density, and agree the top height.
- 2. Do not stretch a coil to measure the top, because it will spring back and the shape will be smaller.
- 3. Cut the top dry, coil by coil, in its natural fall, and keep the shape rounded.
- 4. Fade the sides with a 0.5 guard, about 1.5 mm, at the bottom and a 1 guard, about 3 mm, above it.
- 5. Use a 2 guard, about 6 mm, through the blend and a 3 guard, about 10 mm, at the top of the fade.
- 6. Do not pull the top with a comb while cutting, because the dry shape will change when released.
- 7. Dry check the top and both sides, and use no heat on the coils.
- 8. Rebook in 3 to 4 weeks, and tell him the fade line shows before the top shape does.
Salon example: Joseph's afro fade
Joseph, twenty-nine, a truck driver, came in with thick coily hair and asked for a short afro with a fade. His hair shrank tightly when dry, so I did not stretch a coil to measure the top. We agreed 4 cm of height on top and a low fade at the sides. I cut the top dry, coil by coil, in its natural fall, and kept the shape rounded. Then I faded the sides with a 0.5 guard, about 1.5 mm, at the bottom, a 1 guard, about 3 mm, above it, a 2 guard, about 6 mm, through the blend, and a 3 guard, about 10 mm, at the top. I did not pull the top with a comb. Dried, the top sat round and the sides looked clean. He rebooked in three weeks. I wrote 4 cm and the dry-cut note on his card.
Caution: Do not cut the afro top wet or under tension, because the coils will shrink and the finished shape will sit above the agreed line.
Waves with a low taper
Waves with a low taper keep 8 to 14 cm on top so the wave pattern can lie down, and taper the sides low at the ear and nape, so the top stays the focus. It suits adult men with wavy or coily hair that already forms a pattern, and it needs enough length on top to show the waves. At consultation, look at the wave direction and density, and agree the top length in centimetres. Say that a low taper is not a fade and that the sides will stay soft. Check the crown, because a whorl there will break the wave pattern.
Cut the top to the agreed 8 to 14 cm, following the wave direction and keeping the shape rounded. Then taper the sides low with scissor-over-comb or a clipper guard no shorter than a 1, about 3 mm, at the base, moving to a 2, about 6 mm, at the top of the taper. Keep the line low at the ear and nape, and do not take the taper above the temple. Blend the corner and check both sides. Dry the top and brush it in the wave direction, and keep heat at or below 200 C. The cut takes 30 to 40 minutes and he rebooks in 3 to 4 weeks.
- 1. Consult with dry hair, check the wave direction and density, and agree the top length at 8 to 14 cm.
- 2. Say clearly that a low taper is not a fade and that the sides will stay soft.
- 3. Cut the top to the agreed length following the wave direction, and keep the shape rounded.
- 4. Taper the sides low with scissor-over-comb, or with a 1 guard, about 3 mm, at the base and a 2 guard, about 6 mm, at the top.
- 5. Keep the line low at the ear and nape, and do not take the taper above the temple.
- 6. Blend the corner and check both sides, then check the crown whorl.
- 7. Dry the top and brush it in the wave direction, with heat at or below 200 C.
- 8. Rebook in 3 to 4 weeks, and tell him the top needs 8 cm to keep the wave.
Salon example: Arnav's waves and low taper
Arnav, twenty-five, a sales executive, came in with wavy hair and asked for visible waves on top with clean sides. His pattern started at the crown and the top measured 11 cm. We kept the top at 10 cm so the waves could lie down. I cut the top in the wave direction and kept the shape rounded, then tapered the sides low. I used a 1 guard, about 3 mm, at the base and a 2 guard, about 6 mm, at the top of the taper, and kept the line low at the ear and nape. I did not take the taper above the temple. Dried and brushed in the wave direction with heat below 200 C, the waves sat clearly and the sides stayed soft. He rebooked in four weeks. I wrote 10 cm and the low taper note on his card.
Caution: Do not cut the top below 8 cm, because the waves will stand up instead of lying down and the pattern will be lost.
Middle-part flow
A middle-part flow is a medium-length cut with a centre part and ends at the jaw or the chin, worn loose so the hair moves as one piece. It suits adult men with straight or wavy hair and medium density, and it gives a softer, longer shape than a short crop without becoming a bob. At consultation, find the natural centre part and check the front hairline, then agree the hem at the jaw or the chin in centimetres. Say that the outline will stay solid and only a little internal weight will come out. Show the front and side in the mirror, because the part is the centre of the look.
Cut the perimeter at zero elevation to the agreed jaw or chin mark, keeping the line solid across the back and sides. Then take a few vertical sections inside the shape and point cut below the jaw only, so the hair moves without losing the outline. Over-direct the front sections slightly forward so they sit around the part. Dry the hair, re-part it and check the two sides at eye level. Use heat at or below 200 C and keep the brush moving. The cut takes 45 to 75 minutes and he rebooks in 6 to 8 weeks.
- 1. Consult with dry hair, find the natural centre part, and agree the hem at the jaw or the chin in centimetres.
- 2. Check the front hairline and the crown, and say that the outline will stay solid.
- 3. Cut the perimeter at zero elevation to the agreed mark, keeping the line solid across the back and sides.
- 4. Take a few vertical sections inside the shape and point cut below the jaw only.
- 5. Over-direct the front sections slightly forward so they sit around the part.
- 6. Dry the hair, re-part it, and cross-check the two sides at eye level.
- 7. Use heat at or below 200 C and keep the brush moving.
- 8. Rebook in 6 to 8 weeks, and tell him the front grows first and the part needs a tidy.
Salon example: Siddharth's middle-part flow
Siddharth, twenty-seven, a music teacher, came in with wavy hair to the jaw and asked for a centre part with a loose flow. His natural part was close to the middle and his front hairline was solid. We set the hem at the jaw, 13 cm from the crown. I cut the perimeter at zero elevation and kept the back and sides solid. Then I took a few vertical sections inside and point cut below the jaw only, and over-directed the front sections forward so they sat around the part. Dried and re-parted, both sides fell even and the hair moved as one piece. He rebooked in seven weeks. I wrote 13 cm and the part position on his card.
Caution: Do not force a centre part against a strong cowlick, because the front will split and the flow will look uneven within a day.
Short flow
A short flow keeps about 6 cm on top, swept back a little, and tapers the sides, so the hair has direction without length. It suits adult men with straight or slightly wavy hair and a medium-density top, and it is a good choice for a client who wants a softer finish than a crew. At consultation, agree the top length and the taper height, and check the front hairline to see how the sweep will sit. Show the direction with the comb, and say that the top needs a little length to stay back. Check the crown whorl before you cut.
Cut the top to about 6 cm, following the growth pattern and keeping the front slightly longer, then sweep it back with the comb to check the direction. Taper the sides and back with scissor-over-comb, keeping the blades parallel and the comb moving, and leave the hairline soft. Do not take the taper high above the temple, because the top will lose its support. Blend the corner and cross-check both sides. Dry the top and brush it back, and keep heat at or below 200 C. The cut takes 20 to 40 minutes and he rebooks in 3 to 4 weeks.
- 1. Consult with dry hair, agree the top length at about 6 cm and the taper height at the ear.
- 2. Check the front hairline and the crown whorl to see how the sweep will sit.
- 3. Cut the top to about 6 cm following the growth pattern, with the front slightly longer.
- 4. Sweep the top back with the comb and check the direction before you taper.
- 5. Taper the sides and back with scissor-over-comb, keeping the blades parallel and the hairline soft.
- 6. Do not take the taper high above the temple, because the top will lose its support.
- 7. Blend the corner, cross-check both sides, and dry the top with heat at or below 200 C.
- 8. Rebook in 3 to 4 weeks, and tell him the top holds the sweep only with a little length.
Salon example: Harsh's short flow
Harsh, twenty-three, a delivery partner, came in with straight hair and asked for a cut where the top went back a little but did not look long. His top was medium density and his front hairline was solid. We agreed about 6 cm on top. I cut the top in the growth direction, left the front slightly longer, and swept it back with the comb to check the direction. Then I tapered the sides and back with scissor-over-comb, keeping the blades parallel and the hairline soft. I did not take the taper above the temple, so the top had support. Dried with heat below 200 C, the sweep sat clean. He rebooked in four weeks. I wrote 6 cm and the soft taper note on his card.
Caution: Do not taper above the temple, because the swept top will stand away from the head and lose its shape.
Asymmetric fringe
An asymmetric fringe is longer on one side than the other, with a diagonal line across the forehead, so the face gets a slanted frame instead of a level edge. It suits adult men with straight or slightly wavy hair and enough density at the front to carry the longer side. At consultation, agree which side is longer and write it down, then mark both ends of the fringe in centimetres. Check the natural fall and the hairline, because a strong cowlick can pull the short side out of line. Show the client the diagonal with the comb and confirm the plan before the cut.
Cut the longer side first, with the hair dry and combed forward, and use that point as the guide for the diagonal. Then cut the shorter side to the agreed mark, keeping the line straight between the two points rather than rounded. Point cut the ends lightly so the fringe looks soft, and do not thin the middle. Cross-check by combing the fringe forward and comparing both sides at eye level, then check from above. Dry the fringe and trim any small step. The cut takes 30 to 40 minutes and he rebooks in 3 to 4 weeks.
- 1. Consult with dry hair, agree which side is longer, write it down, and mark both fringe ends in centimetres.
- 2. Check the natural fall and the hairline, because a strong cowlick can pull the short side out of line.
- 3. Cut the longer side first on dry hair, with the hair combed forward, and use that point as the guide.
- 4. Cut the shorter side to the agreed mark, keeping the line straight between the two points.
- 5. Point cut the ends lightly and do not thin the middle of the fringe.
- 6. Cross-check by combing the fringe forward, comparing both sides at eye level, and looking from above.
- 7. Dry the fringe and trim only the small step that the dry line exposes.
- 8. Rebook in 3 to 4 weeks, and tell him the longer side shows regrowth first.
Salon example: Karan's asymmetric fringe
Karan, twenty-eight, a marketing executive, came in with straight hair and asked for a fringe that was longer on one side. His natural fall went to the right, so we agreed the left side would be longer and I wrote it down. I marked the two fringe ends at 9 cm and 12 cm from the crown. I cut the longer side first on dry hair, then cut the shorter side to the mark and kept the line straight between the two points. I point cut the ends lightly and did not thin the middle. I combed the fringe forward and compared both sides at eye level and from above. Dried, the diagonal sat clean. He rebooked in four weeks. I wrote the longer side and both measurements on his card.
Caution: Do not cut the fringe without writing down which side is longer, because a mirrored check will not reveal a reversed diagonal.
Hidden side part
A hidden side part sits in the hair rather than on the skin, so the parting is visible as a direction change, not as a shaved line, and the sides stay connected to the top. It suits adult men with straight or slightly wavy hair and medium density who want a side sweep without a hard barber line. At consultation, find the natural part and agree how far back it runs, then check the crown and hairline for thin spots. Say that the sides will not be disconnected and that the top will keep some weight. Show the part with the comb and confirm which side he combs toward.
Cut the top to the agreed length and comb it across the natural part, then cut with slight over-direction so the front sits where he wears it. Keep the sides connected by cutting them with scissor-over-comb, tapering only the lower edge and leaving the corner soft. Do not shave a line into the part, because it will grow back as a gap and the hidden effect will be lost. Blend the corner above the ear and cross-check both sides at eye level. Dry check the part and the sweep. The cut takes 30 to 40 minutes and he rebooks in 3 to 4 weeks.
- 1. Consult with dry hair, find the natural part, and agree how far back it runs and which side he combs toward.
- 2. Check the crown and hairline for thin spots, and say that the sides will stay connected.
- 3. Cut the top to the agreed length and comb it across the natural part.
- 4. Cut with slight over-direction so the front sits where he wears it.
- 5. Cut the sides with scissor-over-comb, tapering only the lower edge and leaving the corner soft.
- 6. Do not shave a line into the part, because it will grow back as a gap.
- 7. Blend the corner above the ear, cross-check both sides at eye level, and dry check the part and sweep.
- 8. Rebook in 3 to 4 weeks, and tell him the hidden part lasts only while the hair has weight.
Salon example: Naveen's hidden side part
Naveen, forty, a professor, came in with straight, medium-density hair and asked for a side sweep without a shaved line. His natural part was on the left, and he combed toward that side. We agreed the part would run back to the crown and the top would stay at 7 cm. I combed the top across the part and cut with slight over-direction. I cut the sides with scissor-over-comb, tapered only the lower edge, and left the corner soft. I did not shave a line into the part, so it sat inside the hair. Dried, both sides stayed connected and the sweep looked clean. He rebooked in four weeks. I wrote 7 cm and the hidden part note on his card.
Caution: Do not shave a visible line into a hidden part, because it grows back as a gap and the sides will look disconnected.
This is a Nandu Nai textbook. It is a private brand book, not a government licence, and it does not give the right to give medical treatment.