
Read the skin before you open a bottle
A makeup appointment begins before the first brush touches the face. Ask the client to arrive with clean skin if she can, then remove whatever is left with a gentle cleanser and a fresh cotton pad, working from the centre of the face outward and stopping at the lash line. Give the skin ten minutes to dry, because cleansed skin looks different once the water has gone. Ask what she uses at home: a retinoid, an acid, benzoyl peroxide, or a new serum can leave the surface flaky and reactive. Ask about allergies, recent waxing, threading, facials, and any product that has reacted badly before. A short consultation protects the client and saves you from rebuilding a base halfway through the appointment.
Look at the skin in daylight before you choose a single product. Dry patches on the cheeks, oil down the centre, texture across the nose, and redness around the nostrils each change the plan. A face that is dry everywhere needs a richer cream and a thin, flexible base; a face that is oily down the middle needs a light gel and powder only where the shine appears. Look at the eyelids and under the eyes too, because the skin there is thin, creases first, and shows every heavy layer. Note what you see on the client card rather than trusting memory, and photograph the bare face if the client agrees, so that the finished look can be compared with the skin you started from.
Ask what has changed in the last month, not only what the client usually does. A new facial, a course of acne medication, a holiday in the sun, hard water after a move, poor sleep before a wedding, and the week before a period all change how skin behaves without changing its basic type. A client who says her skin is oily may arrive dehydrated from a foaming wash used three times a day. Write down both the type and the current condition. The condition decides the preparation today; the type decides what you keep in the kit for her next visit.
End the consultation with a plan said out loud. Name the finish you are aiming for, the coverage, the areas you will correct, and the parts of the face you will leave alone. Ask whether the client has a photograph of a look she likes, then say plainly what will suit her skin and her event and what will not. If she asks for a shape her face does not have, explain now rather than after an hour of work. Agreement at the start prevents a disagreement at the mirror, and it gives you a reason to refuse a request that would damage the skin.
- 1. Wash your hands, then sanitise them in front of the client.
- 2. Lay fresh paper and put out only the products this look needs.
- 3. Remove the day's makeup with a gentle cleanser and fresh pads.
- 4. Wait ten minutes for the skin to dry and settle before judging it.
- 5. Check the skin in daylight and name what you see: dryness, oil, redness, texture.
- 6. Ask about retinoids, acids, allergies, waxing, threading and recent facials.
- 7. Patch test anything new on the inner forearm and wait before using it.
- 8. Write the answers and the agreed plan on the client card.
Salon example
Nisha, thirty-one, booked a party makeup for her sister's engagement in Delhi. She arrived straight from work with sunscreen, a tired foundation, and a flaking nose. She described her skin as oily, which was only half true: her forehead and nose were shiny, but her cheeks and the sides of her mouth were dry and rough. She had used a retinoid twice that week and had a facial four days earlier. I removed the makeup with a mild cleanser, waited ten minutes, and wrote the details on her card. We used a light gel on the centre of her face and a richer cream on the cheeks, waiting four minutes between them. The base went on without catching on the flakes. I skipped the silicone primer on the dry patches and used it only on her nose. Her makeup held through six hours of photographs and dinner, and she has since stopped using the retinoid on the day of an event. The lesson was not about the products she owned but about the order in which she used them, and that order cost nothing to change.
Caution: Never scrub, exfoliate, or apply a strong acid during a makeup appointment, and do not work over broken, weeping, or inflamed skin; refer the client instead.
Warm, cool, neutral and olive
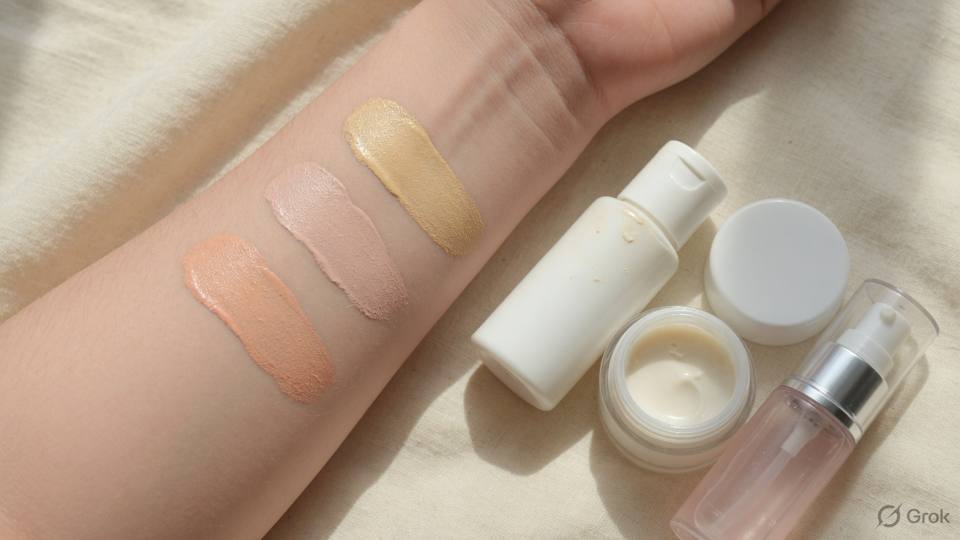
Undertone is the colour beneath the surface of the skin, and it does not change with a tan, a late night, or a bad week. Many artists still test the veins at the wrist, but veins are an unreliable signal: they can look blue, green, or purple on the same arm depending on the light and the depth of the skin above them. The jewellery test fails for the same reason, because metal reflects the room as much as the skin. Look instead at the neck, the chest, and the edge of the jaw in daylight, and compare what you see with three foundation stripes placed side by side.
Warm skin has a golden, yellow, or peachy depth, and it usually tans rather than burns. Cool skin has pink, red, or bluish depth, and it often burns first in strong sun. Neutral skin holds a balance of the two, so neither gold nor pink dominates, and many foundations look acceptable on it for a few minutes before the error shows. None of these labels is a compliment or an insult; they are directions for choosing colour. On South Asian skin the range is wide, and a client can be warm in summer light and olive in winter without her undertone changing at all.
Olive is the label most often missed. Olive skin carries a green or grey-green cast that sits over a warm or cool base, and it can read golden in one room and grey in another. A foundation with a pink base turns olive skin ashy within minutes, and a foundation with too much yellow turns it brassy. The right shade looks slightly muted in the bottle and disappears on the jaw. Keep two or three olive-friendly depths in the kit, especially in the medium and deep ranges, and test them on the jaw rather than on the forehead, which is often a shade deeper from sun.
Light changes the reading more than most artists admit. Tungsten bulbs add gold, fluorescent tubes add green, and the white light of a phone ring light flattens every difference. A match made under warm salon light often looks pink outdoors, and a match made beside a window can look grey at a night event. Read the undertone in daylight, confirm it on the neck, then look again under the light of the event. If the client has been matched before and the result turned orange, ask which product she used; the answer tells you more than a wrist ever will.
- 1. Ask the client to sit facing a window before you open any bottle.
- 2. Look at the neck and chest, not at the wrist or the back of the hand.
- 3. Compare the jaw with three stripes: warm, neutral, and olive-friendly.
- 4. Identify whether gold, pink, or neither dominates the skin.
- 5. Check an olive shade whenever the skin looks golden but turns ashy in pink.
- 6. Ask how the skin behaves in sun: tanning, burning, or both.
- 7. Note the shade name and batch on the card once it matches.
- 8. Look again under the light the event will use before you commit.
Salon example
Sneha, twenty-seven, came for a reception makeup carrying three foundations that all turned pink on her. In the salon she looked warm and golden, so the mistake would have been easy to repeat. I took her to the window and drew three stripes along her jaw: a golden medium, a neutral medium, and an olive medium. The golden stripe looked close at first, the neutral looked flat, and the olive stripe seemed to vanish into her neck. After ten minutes the golden stripe had turned slightly peachy while the olive stripe stayed true. Her previous purchases were all pink-based, bought on a shop assistant's advice under a warm bulb. We wrote the shade name, the batch number, and the word olive on a card she keeps in her bag. She has not bought the wrong foundation since, and she now asks for a sample before she pays. The counter had not been dishonest; it had simply tested her in the wrong light and on the wrong part of her body. She now asks for three stripes and a walk to the window, and she says no shop has refused.
Caution: Do not confirm an undertone under warm salon bulbs, a ring light, or a phone screen; each adds a colour that is not in the skin.
Match the jaw and neck, not the hand
The hand is almost never the right reference. It is usually darker, redder, and more weathered than the face, and it sits at the end of an arm that has seen more sun than the jaw. A foundation that matches the hand will usually sit too dark and too warm on the face, and the client will blame the product rather than the test. Test on the jaw instead: place three stripes from the cheek down to the jawline, blend the lower edge into the neck, and compare the result with the skin below it. Then walk the client to a window and look again, because a shade that is invisible in one light can leave a border in another.
The correct shade should vanish along the jaw and continue the neck without a visible edge. If the neck is lighter than the face, match the neck, because a dark face floating above a pale neck is the first error anyone notices in a photograph. If the neck is deeper than the face, which happens after a holiday, match the face and even the body with a body product if the client wants an even look. Never darken a fair face to match a tanned chest, and never lighten a deeper face to match a pale neck; both produce a mask that reads badly in daylight and worse in flash.
Foundation also changes after it meets the skin. Most liquid formulas oxidise, some by half a shade, a few by a full shade, and the change is fastest on oily skin in heat. Apply the test stripes, wait ten minutes, and look again before you decide. Do not test on skin that is still flushed from threading, waxing, or a facial, because redness pushes both the client and the artist toward pink shades that will look wrong an hour later. If the client has a tan line at the neck, match the lighter area unless the whole chest will be covered by the outfit.
Matching is a measurement, and it should be treated like one. Write the shade, the batch, and the mixing ratio if you adjust it, so that the next appointment starts from a known point. Photograph the finished jaw and neck in daylight and with flash, then show the client both images. A client who has seen the match on her own neck is far less likely to ask for a lighter shade at the last minute, which is often the request that ruins an otherwise good base. When she asks to look fairer, explain what the camera will do with a lighter face and a deeper neck, then let her choose with that knowledge.
- 1. Clean the jaw so no old base sits under the test stripes.
- 2. Draw three stripes from the cheek down to the jawline.
- 3. Blend the lower edge into the neck with a clean sponge.
- 4. Walk to daylight and look at the border, not the centre.
- 5. Wait ten minutes for oxidation before choosing a shade.
- 6. Compare the face with the neck and pick the closer of the two.
- 7. Blend the chosen shade down the throat and past the jaw.
- 8. Record the shade, batch, and any adjustment on the client card.
Salon example
Priya, twenty-nine, was a bridesmaid at a wedding in Jaipur and had been matched to her hand at a counter the week before. She arrived with a face two shades too dark and a hard line at the jaw that her friends had already noticed in the mehndi photographs. We removed the base and started again. Her hand was deep golden, her face medium golden, and her neck lighter still, because her blouse would leave the neck and collarbone visible. I tested three shades along the jaw, waited ten minutes, and chose the one closest to her neck, then blended the last of it down her throat and over the tops of her shoulders with a damp sponge. In the photographs she looks like herself, and the line that everyone had seen is gone. She told me afterwards that she had never known a foundation could be tested anywhere but the hand. I sent her the daylight photograph that evening, and she replied that it was the first picture from that week in which her face and neck were the same colour.
Caution: Do not match a client while the face is flushed from threading or waxing; wait for the redness to settle, or you will choose a shade that is too pink.
This is a Nandu Nai textbook. It is a private brand book, not a government licence, and it does not give the right to give medical treatment.