
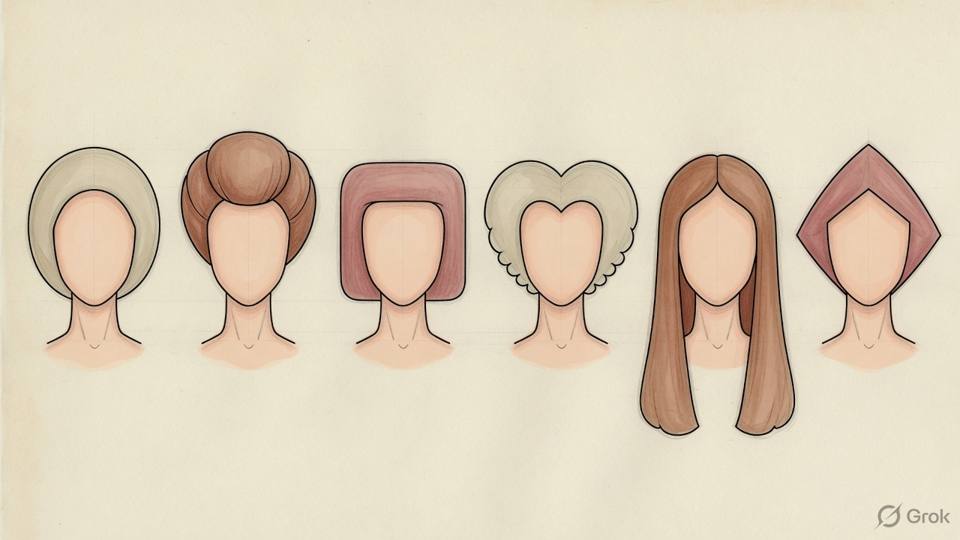
Proportion before labels
Face shape names are shortcuts, not instructions. Oval, round, square, heart, oblong and diamond describe the outline in a photograph, but a living face changes with weight, age, expression and the angle of the jaw. Two clients with the same label can need different cuts because one has a long neck and the other has a short one, or because one has a wide forehead and the other has a narrow chin. Start with proportion: the width of the forehead, the width of the cheekbones, the width of the jaw and the total length of the face. Compare those four numbers with your fingers or a comb, in the mirror, with the hair tied back.
The useful question is where the face is wider and where it is narrower. If the jaw is the widest point, a cut that ends exactly at the jaw adds a second horizontal line at the widest place. If the forehead is the widest point, volume at the temples makes the top heavier. If the face is long, a centre part with no fringe lengthens it further. If the face is short, a heavy fringe and a blunt chin line shorten it. You are not correcting a fault; you are choosing where the eye should stop and where the silhouette should widen or narrow.
Labels fail at the edges. A round face with a strong jaw is closer to square than to round. A heart-shaped face with a wide jaw is closer to oval. An oblong face with a wide cheekbone is a diamond with length. Use the label only after you have measured, and use it to talk to the client, not to choose the cut. Say 'your jaw is the widest part' instead of 'you have a round face'. The first sentence gives the client something to work with; the second sounds like a verdict and invites an argument about a photograph from ten years ago.
The stylist's procedure is short and repeatable. Tie the hair back, look at the face from the front, the side and a slight three-quarter angle. Measure forehead, cheekbone and jaw width against each other, then measure face length from hairline to chin. Look at the neck, the shoulders and the hairline, because a short neck changes a bob as much as a wide jaw does. Note the result in one line on the card: 'jaw widest, long neck, fine hair.' Then design from that line. The label, if you need one, comes last and never overrides the measurements. A stylist who measures first can defend the plan in the chair; a stylist who labels first argues with the mirror.
- Tie the hair back and look at the face from the front, the side and three-quarter.
- Compare forehead, cheekbone and jaw width with your fingers or a comb.
- Measure face length from the hairline to the chin.
- Note the neck length, shoulder width and hairline shape.
- Find the widest point and the narrowest point before choosing a length.
- Write one line on the card: widest point, face length, neck and hair texture.
- Choose the cut to move weight away from the widest point or to balance it.
- Use a shape label only to explain the plan, never to replace the measurements.
Salon example: Divya's jaw and the chin bob
Divya, a software tester in her early thirties, asks for a chin-length blunt bob because it looks sharp on a colleague. Her hair is medium density and straight, so the cut is possible. With the hair tied back, I measure: her jaw is the widest part of her face, her forehead is narrower, and her face is short rather than long. A blunt line at the chin would sit exactly on the widest point and make the lower face look wider. I show her the line with a comb, then move the length two centimetres below the jaw and soften the front with a long layer that starts at the cheekbone. The back stays solid so the shape still reads as a bob. She is unsure until I hold the comb at both lengths in the mirror. She chooses the longer one. The finished cut narrows the jaw instead of framing it, and she books eight weeks ahead. She also takes a photo of the back, and we put it beside the picture she brought, so the difference in the jaw line is visible to her rather than only to me.
Caution: Do not choose a length from a face-shape chart before you have measured the jaw, cheekbone and forehead in the mirror. If the client insists on the chart, show both lengths with a comb and let her see the difference.
Lines, weight and focus
Every haircut is a set of lines. A horizontal line stops the eye: a blunt fringe, a chin-length bob, a straight jaw line. A vertical line carries the eye down: a centre part, long layers, a face frame that falls past the shoulder. A diagonal line moves the eye across the face and softens a corner. The perimeter is the strongest line because it is the edge of the shape, and the layers inside either support it or fight it. Before you cut, decide which line the client will notice first. That line is the focus, and there should be only one.
Weight is where the hair looks and feels heavier. A blunt perimeter puts weight at the ends. Graduation builds weight just above the perimeter. Layers above ninety degrees move weight upward and make the ends lighter. Internal layers remove weight without changing the outline, which is how you keep a solid edge on dense hair. The position of the weight decides whether the shape looks bottom-heavy, top-heavy or balanced. On a jaw that is wide, weight at the jaw doubles the width. On a narrow chin, weight at the chin fills it. On a long face, weight at the cheek adds the width the outline needs.
Focus works with the client's features, not against them. If the eyes are the strongest feature, a fringe or a face frame that ends near the cheekbone brings the eye there. If the mouth is the strongest, a line that stops at the jaw or below lets the eye travel down. If the nose is prominent, a heavy centre fringe can make it look shorter, while a side-swept fringe moves the eye away. Glasses change the calculation because the frame is already a horizontal line at the eye; a fringe that ends exactly on the frame looks crowded. Look at the client with the glasses on before you decide.
The procedure is to choose one focus, place the weight to support it and check the result from three angles. First, decide the focus with the client in plain words: 'I want the eye to go to your eyes, so the fringe will be soft and the length will fall below the jaw.' Second, mark the perimeter and the shortest layer before cutting. Third, cut the perimeter, then the layers, then the detail. Fourth, dry the hair and look from the front, the side and the back, with the client standing, because a seated mirror hides the back and the nape. If two lines compete, remove one.
- Choose one focus for the cut before you pick up the shears.
- Decide whether the perimeter line will be horizontal, vertical or diagonal.
- Mark the perimeter length in centimetres with a comb.
- Place the weight at the perimeter, above it, or inside the shape.
- Keep the shortest layer away from the widest part of the face.
- Check the fringe and the face frame with the client's glasses on.
- Dry the hair and look from the front, the side and the back.
- Remove one line if two lines compete for attention.
Salon example: Neha's two strong lines
Neha, a news anchor, wants a sharp jaw-length bob with a heavy straight fringe. She has dense, straight hair that holds a line well, so both are technically possible. In the mirror, her jaw is narrow, her cheekbones are wide and her glasses sit low on her nose. A heavy fringe would end on the glasses frame, and the jaw-length line would sit at the narrowest part of her face, leaving the cheekbones as the only strong horizontal. That is two competing lines and a shape that reads wider at the middle. I suggest keeping the blunt line but moving it two centimetres below the jaw, and cutting a softer fringe that stops above the glasses and opens at the centre. She can still pin it for the camera. We dry it and check from the front and the side. The eye now travels down the face instead of stopping at the frame. She takes the softer fringe. She also asks for a small side part instead of the centre part in the photo, because the side part gives the root lift her glasses need. I write both changes on the card.
Caution: Do not cut a heavy fringe that ends exactly on the glasses frame or on a strong eyebrow line. Move the line up or down by at least a centimetre, or change the fringe direction.
Fringe, parting and the client's features
A fringe is the most visible part of most haircuts and the part the client touches most. Its width matters as much as its length. A fringe that is too narrow leaves two gaps at the temples; a fringe that is too wide reaches the recession and exposes it. Take the width from the outer corner of one eyebrow to the outer corner of the other, then add a finger on each side. On a receding hairline, keep the fringe narrower and leave the temple corners soft. On a wide forehead, a wider fringe balances the top. On a small forehead, a heavy fringe crowds the eyes and makes the face look short.
The parting is a design decision, not a habit. A centre part suits a symmetrical face and a strong jaw, but it also draws a vertical line down the nose and can make a long face longer. A side part adds asymmetry and volume at the root, which helps a round face and a fine hairline. A deep side part moves weight to one side and can cover a thin temple. If the client has a cowlick at the front, the part has to sit where the hair wants to fall, or the fringe will lift. Test the part with wet fingers and again after drying; the hair will tell you which side it prefers.
Features decide the details. A short forehead needs a fringe with an opening or a side sweep, not a solid block. A long forehead carries a fuller fringe. A prominent nose is softened by a side-swept fringe that ends near the cheekbone, not by a heavy curtain that frames the nose on both sides. A narrow chin is balanced by a fringe that adds width at the top and a face frame that ends at the jaw. Glasses need a fringe that either sits above the frame or falls well below it. Do not design a fringe from a photo without looking at the client's forehead, brows, glasses and hairline in the mirror.
Cut the fringe last, and cut it dry when the hair is straight or wavy. Wet the fringe only if the hair is very straight and you need a clean line, then leave a two to three millimetre margin, dry it and refine. For curly hair, cut dry, curl by curl, and leave more length than looks right, because the spring will lift it. Show the client the shortest point with a mirror before you take it short, and show how to style it with two fingers and a dryer. A fringe grows about one centimetre a month, so book a trim in three to four weeks and write that on the card.
- Measure the fringe width from the outer brow to the outer brow, plus a finger each side.
- Keep the fringe narrower at a receding hairline and leave the temple corners soft.
- Test the parting wet and again dry, and follow the side the hair prefers.
- Decide where the fringe ends relative to the brows, glasses and cheekbones.
- Cut the fringe after the rest of the shape is finished and dry.
- Leave a 2 to 3 mm margin on straight hair, dry it, then refine.
- Cut curly fringes dry, curl by curl, with extra length for the spring.
- Show the shortest point in the mirror and book a trim in 3 to 4 weeks.
Salon example: Alok's receding temples
Alok, a bank manager in his forties, wants a fringe to cover his forehead because he is self-conscious about his hairline. His hair is medium density with a slight wave, and the temples have receded about two centimetres on each side. A wide, solid fringe would cover the forehead but leave the recession visible at the corners, and the wave would make it part in the middle. I measure from brow to brow and keep the fringe narrower than his natural hairline, with soft diagonal ends that fall toward the temples. I cut it dry, starting two centimetres longer than the target, and check the spring after each pass. He sees the shortest point in the mirror before I refine it. The fringe covers the forehead without pretending the temples are full, and the wave sits as a soft side sweep. I show him how to dry it forward with a small brush and book a trim in four weeks. He also asks about colouring the temples later, and I say the fringe is the cheaper way to cover them for now. He laughs and books the trim.
Caution: Do not cut a fringe across a receding temple or a strong front cowlick on the first visit. Cut it dry, keep it longer than the target, and show the client the fall before you refine.
This is a Nandu Nai textbook. It is a private brand book, not a government licence, and it does not give the right to give medical treatment.