
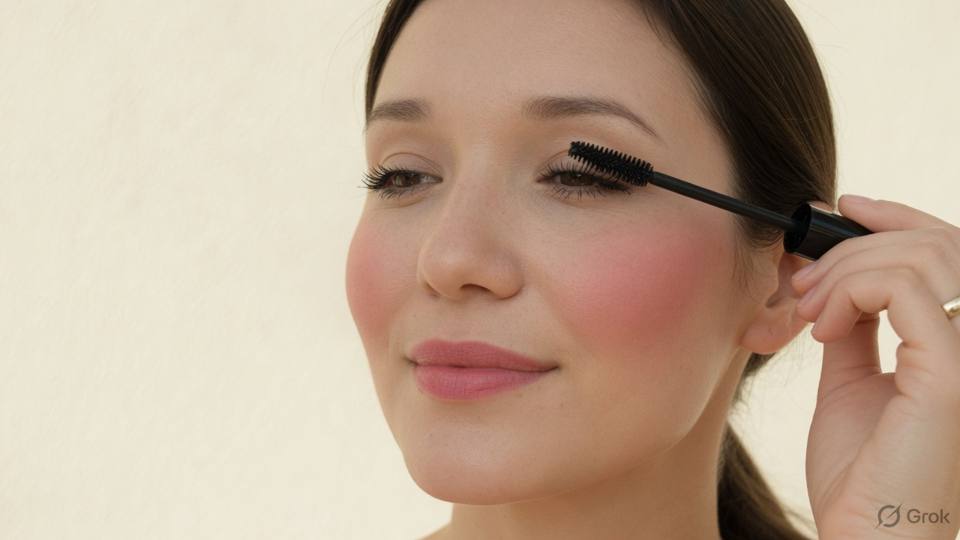
Blush placement by face
Blush should sit where the client's own flush sits, which is usually the apple of the cheek, a little below the outer corner of the eye. From there, blend toward the temple, not toward the nose. Blending inward drags colour into the centre of the face and makes the nose look red, which is the opposite of the healthy look most clients want. The exact placement changes with the face: on a round face, place the blush slightly higher and sweep it outward to add length; on a long face, place it across the cheek rather than high on the bone; on an angular face, keep it soft and round to soften the line of the cheekbone.
On a mature face, keep the blush higher and lighter, because colour placed low on the cheek draws the eye downward and emphasises the jaw. On a deep-skinned face, a bright blush can look chalky if it is applied heavily, so build it in thin layers with a soft brush. A cream blush blends into dry skin and looks natural, while a powder blush holds better on oily skin and in humidity. If the client has texture on the cheeks, use a cream or a finely milled powder and avoid a shimmer that catches on the bumps. The aim is a flush that looks like it came from inside the skin, not a circle of colour sitting on top.
Amount is more important than shade. Load a soft brush, tap off the excess, and apply in small circles, checking after each pass. It is easier to add a second layer than to remove the first, and removing blush usually means removing the base underneath. If the blush is too strong, press a clean damp sponge over it to lift some colour, then set it lightly with powder. If the blush disappears in the photograph, do not double the amount; first check whether the lighting washed it out, because a stage light or a flash can take a soft blush away entirely. The correct fix may be a slightly deeper shade, not more product.
Blush also has to balance with the lip and the eye. A strong lip with a strong blush and a strong eye is three statements at once, and the face loses its focus. If the lip is deep, keep the blush soft and the eye simple. If the eye is smoky, keep the lip closer to the natural colour and the blush light. If the client wants a bright blush, keep the rest of the face quiet so that the cheek is the one thing the eye goes to. Check the finished face in daylight and in a photograph, because blush that looks subtle in the mirror can look like a fever in a phone picture, and blush that looks strong in the mirror can disappear under flash.
- 1. Ask the client to smile and find the apple of her cheek.
- 2. Load a soft brush and tap off the excess product.
- 3. Place the colour on the apple and sweep it toward the temple.
- 4. Keep the inner edge away from the nose.
- 5. Build in thin layers rather than one heavy pass.
- 6. Choose cream for dry skin and powder for oily skin.
- 7. Check the blush in daylight and in a flash photograph.
- 8. Balance the blush with the lip and the eye before finishing.
Salon example
Sonal, thirty-four, had a round face and a habit of applying blush low on her cheeks, close to her nose, because a friend had told her it made her look rosy. At her cousin's engagement she wanted a fresh look for photographs. I showed her the difference on one side: the low placement made her face look wider and her nose look red, while a placement slightly higher and swept toward the temple made her cheek lift and her face look longer. We used a soft peach powder blush, built it in two thin layers, and kept the inner edge well away from the nose. Her lip was a warm rose and her eye was simple, so the blush had room to be the main colour. In the photographs her face looks bright rather than flushed, and she asked me to draw the placement on a card so she could repeat it. She had been using the right product in the wrong place. Her friend, who had given the original advice, now places her blush the same way, and both of them say their faces look longer in photographs.
Caution: Do not place blush low and close to the nose; it makes the face look wider and the nose look red, and it is the hardest mistake to correct once the base is set.
Liner, stain and the lip you can trust
A lip that lasts starts with the pencil. Line the whole lip, not just the outline, and fill it in before the lipstick. The pencil gives a base for the colour, keeps the edge clean, and leaves a stain when the top layer wears away. Choose a liner close to the natural lip colour, or one shade deeper than the lipstick, and blend the inner edge so there is no hard line between pencil and lipstick. If the client wants a fuller shape, take the liner slightly outside the natural line at the centre of the lower lip and blend it inward, so that the edge looks soft rather than drawn on with a ruler.
Prep matters as much as product. Dry, flaky lips hold colour unevenly, so ask the client to use a balm for several days before the event. On the day, apply a thin layer of balm, let it sit for a minute, and blot it before the colour. Remove flakes with a damp cloth, never by picking. If the lips are very dry, a creamy lipstick is kinder than a matte one, and a stain underneath keeps the colour even if the cream wears off. A matte finish photographs well but shows every crack, so the condition of the lip decides the finish more than the trend does.
For long wear, build the colour in layers. Apply the lipstick, blot with a tissue, dust a little powder through the tissue, and apply again. This sets colour in the lip rather than on it. A gloss can go on top as a final layer, but it should be carried for touch-ups because it disappears first. Warn the client that a mark on a glass is normal and does not mean the lip has failed. If the event includes a meal, a stain under the lipstick is the difference between a lip that fades evenly and a lip that leaves an outline with a bare centre. Choose a stain that matches the lipstick, because a stain in a different undertone will show through as the top layer wears.
Hygiene around the lip is not negotiable. Never share a lip product from a jar, and never double-dip an applicator that has touched a mouth. Take the product out with a clean spatula onto a plate, apply it with a disposable applicator, and throw the applicator away. Sharpen the pencil before each client and wipe the blade. If the client has a cold sore, a cracked lip that is bleeding, or an infection at the corner of the mouth, do not apply colour over it. Refer and reschedule. Lip colour over a cold sore spreads the virus, delays healing, and turns a small problem into a week of discomfort.
- 1. Apply a thin balm, wait a minute, and blot it before colour.
- 2. Remove flakes with a damp cloth, never by picking.
- 3. Line and fill the whole lip with a pencil close to the natural colour.
- 4. Blend the inner edge of the pencil into the lip.
- 5. Apply the lipstick or stain in a thin layer.
- 6. Blot, powder through a tissue, and apply a second layer.
- 7. Add gloss only on top, and pack it for touch-ups.
- 8. Use a clean spatula or disposable applicator, never a shared jar.
Salon example
Noor, twenty-nine, was hosting her sister's bridal shower and wanted a deep berry lip that would survive photographs, lunch, and a lot of talking. At the trial she admitted that her lipstick usually disappeared by the main course and left a dark outline. We lined and filled her whole lip with a berry pencil, applied a matching stain, blotted, powdered through a tissue, and then applied the lipstick. She ate a full meal and drank two cups of tea. The colour faded slightly in the centre but the stain kept the lip even, and the outline was still soft. She carried the pencil and lipstick in a small pouch and touched up once before the photographs. At the end of the day her lips looked stained rather than painted, which is what she had asked for. She said the pencil was the part she had never understood, and now she buys one with every lipstick. Her sister asked for the same method at her own shower, and the stain survived a three-course lunch. Noor now keeps a pencil in every bag she owns, and she has stopped buying gloss for evenings that last more than four hours.
Caution: Never use lip colour from a shared jar or double-dip an applicator that has touched a mouth; use a clean spatula and a disposable applicator.
Mascara hygiene and when to skip the lash
Mascara is the product most likely to carry infection from one client to another, because it sits on the eye and the wand goes back into the tube. Use a disposable wand for every client, and never re-dip a used wand. Do not pump the wand in the tube, which pushes air and bacteria into the product and dries it out. Replace the tube regularly, and never add saliva or water to loosen a dried formula. If a client has an eye infection, do not use mascara on her at all, even with a fresh wand, because the product can pick up the infection from the lashes and the tube can become contaminated. Keep the tubes closed when not in use and store them away from heat.
Application is a small skill with a large effect. Curl the lashes before mascara, at the root, and hold for a few seconds. Wiggle the wand at the base of the lashes and sweep upward, rather than coating the tips only. Do the upper lashes first, then the lower lashes with the tip of the wand, and use less product on the lower lashes. If a lash clumps, separate it with a clean spoolie while the mascara is still wet. Do not apply a second coat over dried mascara, which creates flakes that fall onto the cheek. For a client with sparse lashes, a thin coat on the upper lashes and a tightline gives more definition than three coats of volume mascara.
Sometimes the right decision is to skip lashes altogether. Sensitive eyes, contact lenses, a recent stye, conjunctivitis, an eye that waters continuously, or a client who rubs her eyes are all reasons to keep the eye simple. Windy outdoor events and very humid weather can also make lashes uncomfortable or messy. Strip lashes need glue, and glue needs a patch test at least a day before the event. Do not apply a strip lash to an eye that is irritated, and do not use a lash glue that has been shared or has been open for months. Individual lashes are lighter but still need clean tweezers and a fresh glue dot for each client.
If you do use lashes, plan the removal as carefully as the application. Tell the client how to take them off, and give her a small amount of the remover if she is travelling. Never pull a strip lash off dry, because it takes natural lashes with it. For waterproof mascara, use a balm or an oil-based remover, let it sit for a minute, and wipe gently downward with a damp pad. Do not rub, and do not use a harsh soap on the eye area. A client who removes her eye makeup properly will have lashes for the next appointment; a client who pulls them off will not, and she will blame the mascara rather than the removal.
- 1. Use a fresh disposable mascara wand for every client.
- 2. Do not pump the wand or add water to a dry tube.
- 3. Curl the lashes at the root before mascara.
- 4. Wiggle the wand at the base and sweep upward.
- 5. Separate clumps with a clean spoolie while the mascara is wet.
- 6. Skip lashes if the eye is irritated, infected, or very sensitive.
- 7. Patch test lash glue a day before the event.
- 8. Remove waterproof mascara with a balm, not by rubbing.
Salon example
Priyanka, twenty-seven, wanted strip lashes for an outdoor evening party by a lake. She wore contact lenses and had sensitive eyes, and she had never used strip lashes before. At the trial I applied a strip lash to one eye with a fresh glue dot and waited ten minutes. Her eye watered and the lash lifted at the inner corner, so we removed it. Rather than forcing the lash, we curled her natural lashes, tightlined the upper lash line, and used a thin coat of mascara with a fresh wand. The result looked defined without anything sitting on the eye. At the party the wind was strong, and she told me later that she was glad she had no strip lash to worry about. She still wanted lashes for her sister's wedding, so we tested a different glue two weeks before, and that one worked. The first test saved the second event. She now keeps a small spoolie and her own mascara in her bag, and she asks for a fresh wand at every appointment. She also told her sister, who wears lenses, to do the same before her wedding.
Caution: Do not apply a strip lash or lash glue to an eye that is red, swollen, or watering; stop, remove the product, and refer the client.
This is a Nandu Nai textbook. It is a private brand book, not a government licence, and it does not give the right to give medical treatment.