
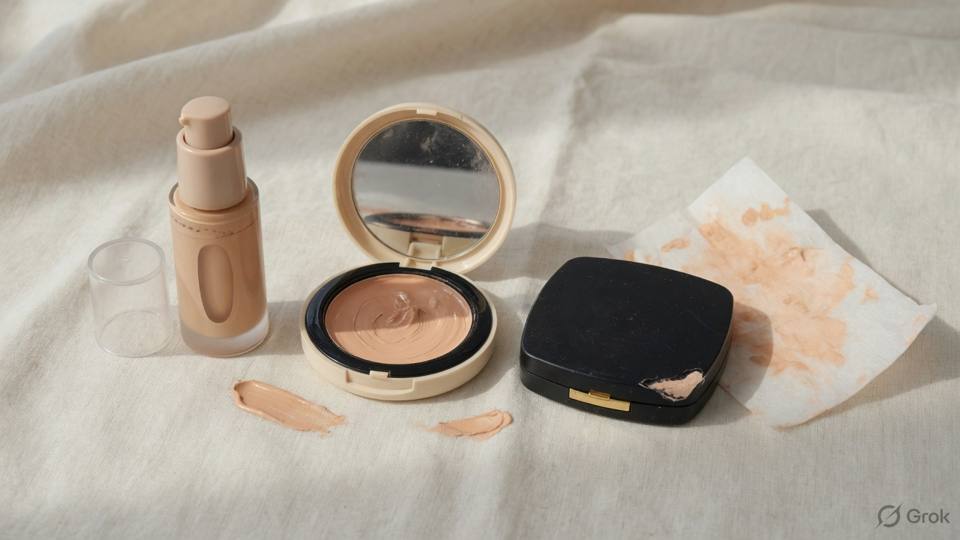
Dry skin: moisture before coverage
Dry skin lacks oil, and it often lacks water as well. It looks tight after cleansing, feels rough on the cheeks, and shows fine flakes around the nose and the mouth. Dry skin is not the same as dehydrated skin, which lacks water and can feel tight even when it is oily. The difference matters because the preparation is different: dry skin needs a richer cream to seal the surface, while dehydrated skin needs water-based hydration and a lighter seal. Ask how the skin feels an hour after washing, and look at it in daylight before you decide. Whatever the cause, a base applied over dry, flaky skin will catch on the flakes and look patchy within an hour.
Prepare with a gentle cleanser, not a foaming one, and give the skin a minute before the next layer. Use a hydrating serum if the skin is dehydrated, then a richer cream on the cheeks and the sides of the face, and a lighter lotion on the centre if that area is less dry. Wait three to five minutes, until the cream has sunk in and the surface is not wet. A base applied over wet cream will pill and slide. If the client has a flaking patch, do not scrub it; soften it with a little cream and press a damp cloth over it, then remove only what lifts easily. Scrubbing creates redness and makes the flake worse.
Choose a base with a soft, flexible finish rather than a matte one, and apply it with a damp sponge in thin layers. A matte foundation on dry skin emphasises every flake and looks flat in daylight. If the client wants more coverage, build it with a second thin layer on the areas that need it, and use a small amount of creamy concealer rather than a heavier foundation everywhere. Leave the cheeks and the outer face unset, or set them with the tiniest amount of powder. A cream blush sits better on dry skin than a powder blush, and a setting spray at the end can melt the powder into the skin so that the finish looks less dusty.
The common mistakes with dry skin are all forms of impatience. Exfoliating during the appointment, applying a strong acid, layering a smoothing primer over flakes, and powdering the whole face are the four that cause the most damage. A smoothing primer sits on top of the flakes and makes them more visible, not less. If the dryness is severe, if the skin is cracked, or if there is a rash, do not treat it with makeup. Refer the client to a skin therapist or a doctor and offer a look that works around the affected area. Dry skin is a condition to manage, not a fault to hide, and the client will trust you more if you say so.
- 1. Cleanse with a gentle, non-foaming product and pat the skin dry.
- 2. Ask how the skin feels an hour after washing.
- 3. Apply a hydrating serum if the skin feels tight and looks dull.
- 4. Use a richer cream on the dry areas and a lighter lotion elsewhere.
- 5. Wait three to five minutes for the cream to absorb.
- 6. Apply a hydrating base in thin layers with a damp sponge.
- 7. Leave the cheeks unset or use only a trace of powder.
- 8. Finish with a setting spray to soften the powder.
Salon example
Nandini, thirty-six, came for a winter wedding guest makeup in January. Her skin was dry and flaking around the nose, and she had used a foaming face wash that morning because she thought the flakes were dirt. She had also applied a smoothing primer, which had made the flakes more visible. We cleansed with a mild milk cleanser, pressed a damp cloth over the flaking area, and used a hydrating serum followed by a richer cream on the cheeks. I waited five minutes, then applied a hydrating base with a damp sponge in two thin layers. The cheeks were left unset, and only the sides of her nose got a trace of powder. Her blush was cream, and a setting spray finished the face. In the photographs her skin looked smooth and slightly luminous, and the flakes were not visible. She asked what she should change at home, and the answer was the cleanser, not a new foundation. She switched to a cream cleanser and a heavier night cream, and her next appointment needed half the preparation. At that appointment she said her skin no longer stung after washing, which mattered more to her than the makeup.
Caution: Do not scrub, exfoliate, or apply an acid to flaking skin during a makeup appointment; it makes the flakes worse and leaves the skin red under the base.
Oily and combination: shine where it belongs
Oily skin produces more sebum, usually on the forehead, nose, and chin. It is not a fault, and it ages more slowly than dry skin in many people. The problem for makeup is that oil lifts the base, especially in heat, and powder applied over oil turns into paste. The answer is not to strip the skin with harsh cleansers or alcohol toners, which often makes it produce more oil. Cleanse gently, use a light gel moisturiser, and let it absorb. A mattifying primer on the T-zone can help, but only on the areas that actually shine; the dry cheeks need something else, or the base will look chalky there.
Choose a light base with a natural or semi-matte finish and apply it in thin layers. Press powder only where the shine appears, and use a small puff rather than a large brush. Blotting papers are more useful than extra powder during the day, because they remove oil without adding product. If the client is going to be in a hot room, set the sides of the nose and the chin, which are the first places to break down, and leave the outer cheeks lighter. A setting spray can help the powder melt in, but it will not stop oil; only blotting and a light touch-up will do that.
Combination skin needs zones rather than a single routine. Use a light lotion everywhere, a richer cream only on the dry cheeks, a mattifying primer only on the T-zone, and a base that works for both areas. Powder the centre and leave the outer face alone. This sounds like more work, and it is, but it produces a face that looks even rather than a face that is shiny in the middle and flaky at the edges. Do not apply two different foundations in thick layers and try to blend them in the middle; the seam will show. One base in thin layers, with preparation adjusted underneath, is easier to control.
Oil also affects the choice of blush, highlighter, and setting products. A heavy cream blush slides on oily skin, and a strong highlighter looks like sweat by the second hour. Use a powder blush on the oily areas and a cream blush only on dry cheeks, and keep the highlighter small. If the client has acne, avoid heavy silicone primers on active spots, keep the brushes clean, and do not pick or squeeze anything. Oily skin can carry a slightly dewy finish well, but the dew should sit on the cheekbone, not across the whole face. At the end of the appointment, check the T-zone in daylight and blot anything that already looks wet.
- 1. Cleanse gently and avoid alcohol-heavy toners.
- 2. Apply a light gel moisturiser and let it absorb fully.
- 3. Use a mattifying primer only on the T-zone.
- 4. Apply a light base in thin layers over the whole face.
- 5. Press powder on the forehead, nose, chin, and inner cheeks.
- 6. Leave the outer cheeks and jaw lighter or unset.
- 7. Choose powder blush on oily areas and cream blush on dry ones.
- 8. Pack blotting papers for the event, not another layer of powder.
Salon example
Karan, thirty, was a groom for a summer wedding with a long morning of rituals and an evening reception. His skin was oily on the forehead and nose and normal on the cheeks, and he had never worn makeup. He was worried about looking shiny in the photographs. We cleansed gently, used a light gel moisturiser, and applied a mattifying primer only on the centre of his face. The base went on in two thin layers with a damp sponge, and I pressed powder on his forehead, nose, and chin. His cheeks were left almost bare. At the reception, his brother blotted his forehead once and pressed a small amount of powder. In the photographs his skin looks even and healthy, with a little shine on the cheekbones where light should fall. He said he had expected to feel painted and instead felt like himself, only less tired. His bride asked me to use the same method on her brother, whose skin was oilier still, and it worked with a lighter powder. Karan kept the blotting papers in his pocket all evening and did not need them once.
Caution: Do not put a heavy mattifying primer or powder on the dry cheeks of a combination face; it turns the base chalky and shows every flake.
Primer is one product, and the SPF that flashes white
A primer is a preparation step for one concern, not a collection of bottles. A smoothing primer fills the look of large pores and texture, but only on the areas that need it. A mattifying primer controls oil on the T-zone. A hydrating primer helps dry patches, and a green-tinted primer reduces redness when used sparingly. A light-reflecting primer adds brightness, but a glitter primer adds particles that show in photographs. Choose the one concern that matters most for this client and this event, and use it only where it is needed. If the skin is generally good, a primer may add nothing at all, and the base will sit better without it.
Do not mix three primers on one face. Silicone-based and water-based products can pill against each other, especially when one is applied before the other has set. If you must use two, keep them in separate zones and let each set for a minute before the next layer. If the base starts to roll into small flakes under the sponge, stop and remove the area rather than pressing harder. Pilling is a sign that the layers are incompatible, not that the base is bad. The same rule applies to a primer under a water-based foundation: check the texture on the jaw before you commit to the whole face.
Sunscreen is the product that causes the most trouble in photographs. It is essential outdoors and in daylight, and it is regulated in many countries because it makes a protective claim. Some filters, particularly the mineral ones, leave a visible white cast on deeper skin, and that cast becomes stronger under flash. If the event is at night with flash, test the sunscreen on the jaw before the base, and photograph it. If it flashes white, use less, choose a different product for the event, or keep the sunscreen for the neck and ears where the sun actually falls. Do not skip protection for an outdoor ceremony, and do not pretend that a product with a cast is invisible.
The combination of a heavy sunscreen and a heavy silica powder is the worst case for a night photograph on deep skin. Each product may be fine alone, but together they reflect a large amount of light back at the camera. Test the stack, not the individual products, and test it at the distance the photographs will be taken. If the face looks pale in the test, remove the powder first, then reduce the sunscreen if needed. A finely milled powder matched to the skin and a lighter sunscreen will usually solve it. The client should leave knowing which products were used, because she may be photographed again at another event with the same base.
- 1. Decide the one concern the primer needs to solve.
- 2. Apply a smoothing primer only on textured areas.
- 3. Use a mattifying primer only on the T-zone.
- 4. Let each primer set before applying the next layer.
- 5. Apply sunscreen to the face, neck, and ears for outdoor events.
- 6. Test the sunscreen on the jaw with a flash photograph.
- 7. Reduce or replace a sunscreen that flashes white.
- 8. Photograph the full stack before the client leaves.
Salon example
Ishaan, thirty-one, was attending a haldi ceremony outdoors at eleven in the morning and a dinner indoors at eight. He had fair-to-medium skin and used a high-protection mineral sunscreen every day. At the trial we applied the sunscreen and photographed his jaw with flash. The jaw went noticeably paler than his neck, and the difference was obvious in the picture. We tried a lighter chemical sunscreen for the face, kept the mineral one for his neck and ears where the sun would fall, and photographed again. The cast was gone. For the outdoor ceremony we added a hat and a light powder only on the nose. At the dinner the base matched his neck in every photograph. He said he had never understood why his face looked pale in wedding pictures, and now he tests a sunscreen before an event. The fix cost him one extra product, not a new routine. He now keeps the lighter sunscreen in his bag for evening functions and uses the mineral one for sport, where the white cast does not matter. He also keeps a small note of which sunscreen passed, because he buys the same one for every family wedding.
Caution: Do not layer a heavy sunscreen and a heavy silica powder on deep skin for a flash photograph without testing the combination on the jaw first.
This is a Nandu Nai textbook. It is a private brand book, not a government licence, and it does not give the right to give medical treatment.