
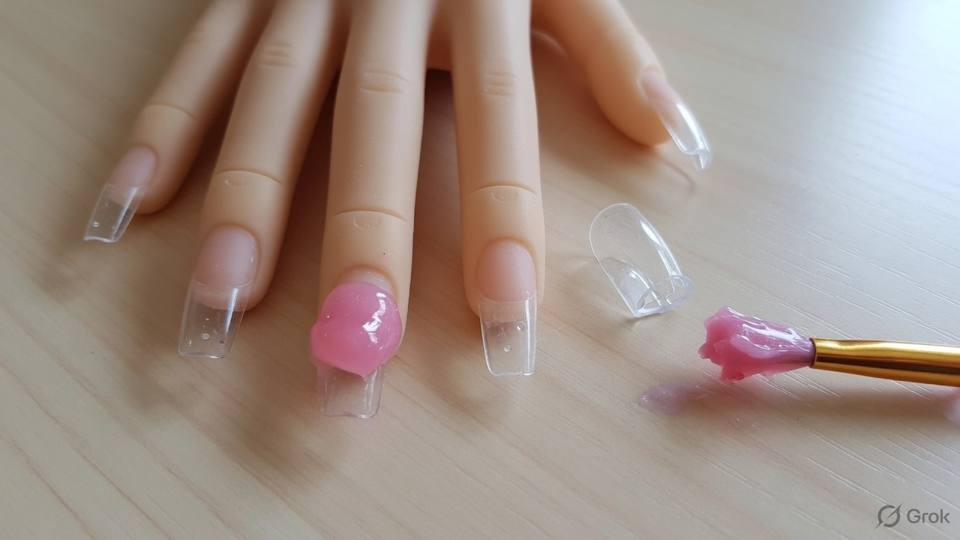
Apex and the stress area
An enhancement is a small structure, and like any structure it needs to carry load to the right place. The apex is the highest point of the product, built over the stress area, which is roughly the middle of the nail and slightly toward the free edge. When the nail is pressed or knocked, the force travels through the apex and spreads into the sides instead of concentrating at one line. Without an apex, the product is a flat sheet, and a flat sheet cracks at the point where it bends. With an apex that is too far back, the free edge acts as a lever and the stress lands at the cuticle, where the seal is weakest.
Build the apex deliberately. With acrylic, place the bead in the stress zone and pat it into a dome, keeping the product away from the cuticle and the side walls. With gel, place a small amount in the same zone and let it settle before curing, or use a structure layer and cure it in stages. The highest point should feel smooth under the finger, not like a lump. The transition from the apex toward the cuticle should be gradual, so the product thins to a hairline at the base. The free edge should have enough product to resist chipping but not so much that it looks like a shelf. Check the profile from the side after every layer.
A bad apex has a few recognisable shapes. A flat nail has no dome at all, and it flexes when pressed. A back-weighted nail has the high point near the cuticle, and it lifts there or snaps across the middle. A tip-heavy nail has a thick free edge and a thin middle, and it breaks at the stress line. A lumpy apex has a high spot that was never smoothed, and it catches on everything. Each of these is a structure problem, not a product problem, and each is fixed by rebuilding rather than by adding more product on top. Learn to see the profile from the side before the client leaves the chair.
The apex also changes with length and with the client's work. A short overlay needs only a subtle apex, because there is little lever arm. A long extension needs a more pronounced apex and a shorter length if the hands are busy. A client who types all day puts repeated small loads on the tips, and a client who lifts boxes puts sudden heavy loads on the stress area. Ask about both, and build for the heavier one. If the client wants a length that the apex cannot support, say so before you start. A structure that is honest about its limits lasts longer than one that pretends to be stronger than it is.
- 1. Find the stress area before you place any product.
- 2. Build the apex over that area, slightly toward the free edge.
- 3. Keep the product thin at the cuticle and thin at the side walls.
- 4. Pat acrylic into a smooth dome instead of pumping the brush.
- 5. Cure gel in thin layers so the apex sets all the way through.
- 6. Check the side profile after every layer, and correct it early.
- 7. Match the apex to the length and to the client's daily work.
- 8. Rebuild a bad apex instead of covering it with colour.
Salon example
A client named Anjali wants long almond extensions for a family photo shoot. The technician builds the first nail, cures it, and looks at the profile from the side. The apex is too far back, close to the cuticle, and the free edge is heavy. She does not add more product to hide it. She removes the layer with a file, rebuilds the apex over the stress area, and shortens the length by two millimetres. The second attempt has a gentle dome and a lighter tip. She shows Anjali the side view and explains that the first version would have lifted at the base within a week. She builds the other nine the same way, checking each one from the side before moving on. The photo shoot goes well, and Anjali returns after three weeks with no lifts and no cracks. At the fill, the technician moves the apex forward as the nail has grown, rather than filing colour over the old shape. Anjali books a fill at three weeks, and the technician keeps the side view check in every appointment.
Caution: An apex filed into the surface is a shape, not structure.
Side walls and the cuticle gap
The side walls are where an enhancement meets the skin, and they decide whether the set feels comfortable and whether it lifts. The product should follow the natural side wall and tuck in slightly, so the edge is not wider than the nail. A side wall that flares out catches on clothing, hair, and drawers, and the first knock levers the product away from the plate. A side wall that is filed too narrow looks pinched and puts stress on the corner. Keep the line smooth from the cuticle to the free edge, and check it from the tip of the finger as well as from above. The client feels a sharp side wall before they see it.
The cuticle gap is the hairline margin between the product and the skin at the base. It exists for two reasons: the skin moves, and the product does not, so a product that touches the skin will be pushed away as the hand works; and uncured product on the skin is a sensitizer. Keep the gap clean before the product sets or cures. With acrylic, clean the edge with a brush or an orange stick before the bead hardens. With gel, wipe any product that has touched the skin with a clean brush before curing. Do not flood the gap to make the nail look longer or to hide a ragged cuticle line. A clean margin looks deliberate and lasts.
Side walls and cuticle gaps fail for predictable reasons. Product on the skin lifts first, because it bonds to the skin rather than to the plate. A gap that is too small leaves no room for growth, so the product is pushed up within days. A gap that is too large looks like a regrowth line on day one and collects dirt. A side wall that is too wide catches, and a side wall that is too narrow cracks. The fix is not more product but better placement. Watch the product as it settles, and correct the edge while it is still movable. After it sets, the only correction is a file, and a file cannot put back a seal that was never there.
Finishing is part of the structure. After the product sets, refine the side walls with a file held at a shallow angle, and keep the natural plate untouched. Smooth the transition at the cuticle so the client cannot feel a ridge when they run a finger over it. Check the underside of the free edge for sharp corners. Look at all ten nails together, because a side wall that looks fine on its own can look uneven next to its neighbour. Then ask the client to feel the edges. If they can feel a sharp point, it will catch on something before the week is out, and it is cheaper to fix now than to repair a lifted nail later.
- 1. Follow the natural side wall, and tuck the product in slightly.
- 2. Keep the side wall no wider than the natural nail at the widest point.
- 3. Leave a hairline gap at the cuticle, wide enough for growth.
- 4. Clean acrylic away from the skin before the bead hardens.
- 5. Wipe gel off the skin with a clean brush before curing.
- 6. Never flood the cuticle gap to hide a shape or a ragged line.
- 7. File the finished side wall at a shallow angle, off the natural plate.
- 8. Ask the client to feel the edges, and smooth anything sharp before they leave.
Salon example
A client named Neha has a set of acrylics that keep lifting at the sides of her index fingers. The technician looks closely and sees that the product flares out beyond the natural side wall on both hands. The flare catches on her sleeves and on the edge of her phone case, and each knock opens the seal a little more. The technician removes the lifted product, cleans and dries the plate, and rebuilds the side walls so they follow the natural line. She keeps the cuticle gap a little wider than before, because Neha's nails grow quickly and the old gap had closed within a week. She cleans the edges with an orange stick before the acrylic sets and checks each nail from the tip. Neha says the set feels narrower and more comfortable. At the two week check there is no lift, and the technician notes the faster growth pattern so the next fill is booked a few days earlier. Neha also stops carrying her phone against that hand, which was part of why the flare caught so often.
Caution: Product on the cuticle or side wall will lift first, every time.
Never fill over a lift
A lift is a separation between the product and the natural nail, and it shows as a shadow, a white edge, or a slight movement when you press. It happens for reasons that are usually visible: product on the skin, a gap that was too small, a knock, a soft plate, or a set left on too long. Under the lift there is a pocket, and the pocket holds water, soap, dust, and bacteria. If you fill over that pocket, the new product bonds to the old product and to the edge of the gap, not to a clean plate. The lift continues underneath, the pocket grows, and the next knock takes the whole set with it.
A fill over a lift also hides a problem you have not seen. The plate under a lift can be stained, soft, or separated, and a cover keeps it dark and damp. That is how a small green stain becomes a larger one, and how a nail that could have been cleaned and dried becomes a nail that needs a referral. The correct procedure is to remove the lifted product, clean the area, dry it, and look at the plate. If the plate is sound and the colour is normal, re-prep and rebuild. If the plate is green, crumbly, painful, or separated, do not cover it; refer, and leave it open. There is no cosmetic shortcut that is worth a bacterial pocket.
Removing a lift needs the same care as a full removal. File the product thin around the lifted area, then soak the remaining product or lift it gently with a pusher once it is soft. Do not slide a metal tool under the product and lever it, because that is how the plate is torn. Do not drill into the gap to clean it, because the bit can catch the skin. Clean with a soft brush and the appropriate cleanser, dry thoroughly, and inspect. If the plate looks healthy, the area can be re-prepped with a light buff and rebuilt. If the client is in a hurry and asks you to skip the removal, explain that a fill over a lift is a temporary look with a guaranteed repair.
The client conversation is easier when you show the lift rather than describe it. Hold the finger so they can see the shadow, press gently and let them see the movement, and explain that water is getting in. Give them the plan: removal today, a rebuild if the plate is sound, or a rest and a referral if it is not. If they have an event, offer to do the other nails and keep the affected one simple and bare, or shorten the set and remove the lifted section. Do not promise that a fill will hold until the weekend. It might, but if it does not, the client will remember the promise and not the explanation.
- 1. Check every nail for a lift before you start a fill, including the ones that look fine.
- 2. Press gently and look for a shadow, a white edge, or movement.
- 3. File the product thin around the lift before you try to remove it.
- 4. Soak the remaining product, and lift it only when it is soft.
- 5. Never lever with a metal tool or drill into the gap.
- 6. Clean and dry the plate, then inspect the colour and the surface.
- 7. Rebuild only if the plate is sound; refer if it is green, crumbly, or painful.
- 8. Explain the plan before you start, and do not promise a fill will hold.
Salon example
A client named Poonam comes for a fill four weeks after her last appointment. Two nails have lifted at the cuticle, and she asks the technician to fill them quickly because she has a meeting in the afternoon. The technician shows her the shadow under the product and explains that filling over it would trap water. She removes the lifted product on both nails, soaks the last layer, and cleans the plate. One plate looks healthy, so she re-preps and rebuilds it. The other has a small green patch near the side wall, and she does not cover it. She refers Poonam to a doctor if it spreads or becomes painful, and leaves the nail bare. She fills the remaining eight nails and books a review in a week. Poonam is annoyed about the bare nail, but at the review the green has faded and the plate is firm. The technician rebuilds that nail then, and notes on the card that the set had been left four weeks, so the next fill is booked at three. The card note also records the three week interval, and the booking desk offers it at the next visit.
Caution: A lift is an open door; filling over it closes the door with the water inside.
This is a Nandu Nai textbook. It is a private brand book, not a government licence, and it does not give the right to give medical treatment.